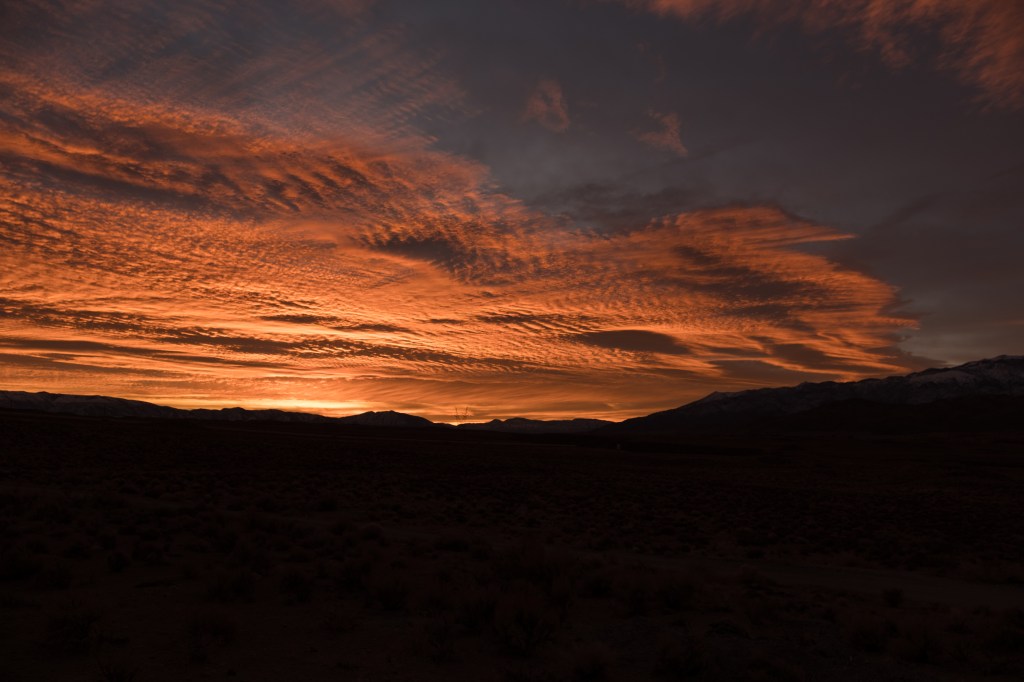
Quiz: Pick the one best answer
A great animal migration can be seen by visiting:
1. East Africa
2. South Sudan
3. Northern Alaska
4. Central Nebraska
5. All of the above
The answer is 5. East Africa has a famous migration of 1.5 million wildebeests and zebras. South Sudan hosts the Great Nile Migration of 6 million antelopes. Alaska is famous for the journeys of 200,000 caribou in the Porcupine Herd. And the Cornhusker State is on this list because half a million Sandhill Cranes use the Platte River as a stopover site for their migration in March.
Worldwide there are over a dozen species of crane. In the US we have two: the rare Whooping Crane and the Sandhill Crane. There are Sandhill Cranes in almost every state and they vary in their migratory habits. In Cuba, Florida, and Mississippi there are Sandhill Cranes that do not migrate. The Cranes in California’s Central Valley migrate to several areas in the Western States. There are other groupings: Eastern Flyway, Rocky Mountain, Lower Colorado, and Pacific Flyway.
The biggest Sandhill Crane group is the Mid-Continent population. This tribe spends the winter in Mexico, the Texas plains, the Gulf Coast, and at Bosque-del-Apache in New Mexico. In the early spring, these cranes fly north; by late spring they will reach the tundra of Canada, Alaska, and Siberia. In the far north they build nests, lay eggs, and raise their chicks. Then the parents and juveniles fly back south in the fall.
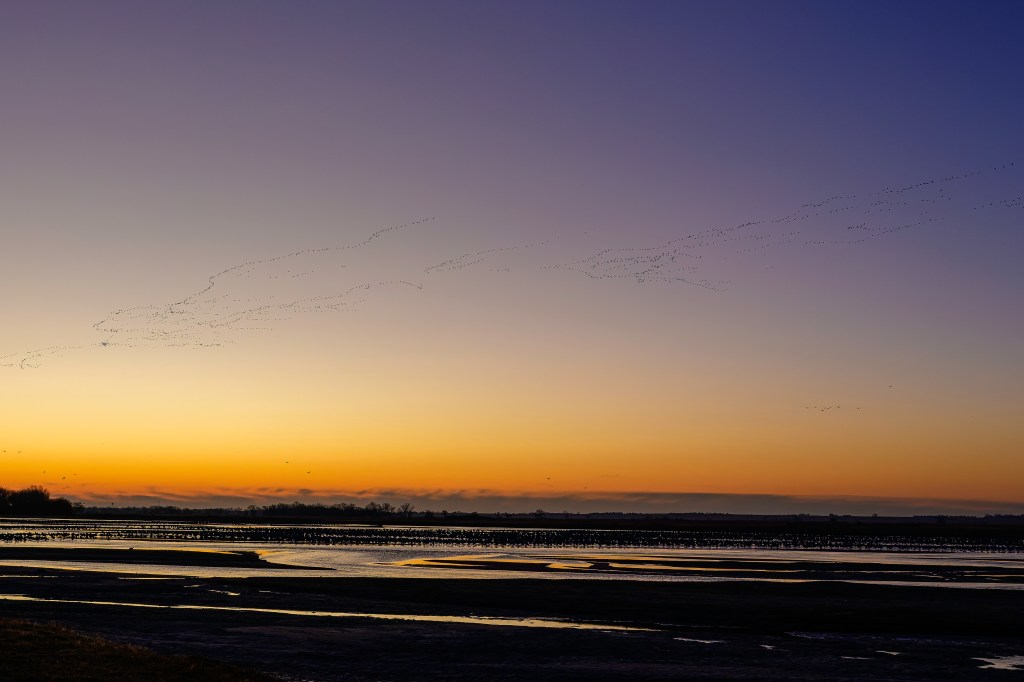
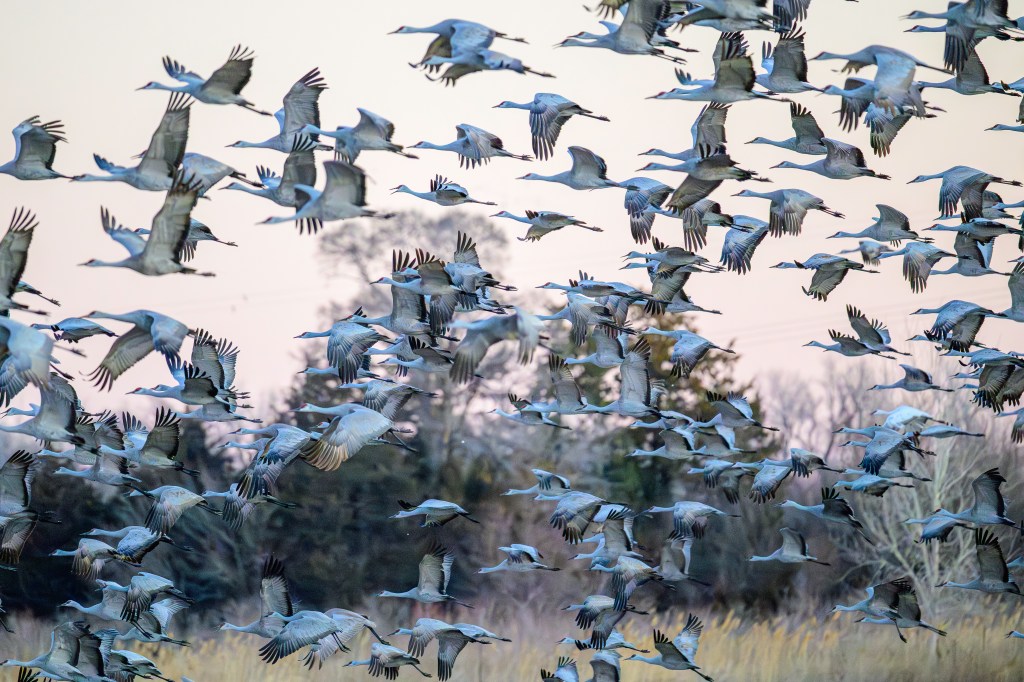
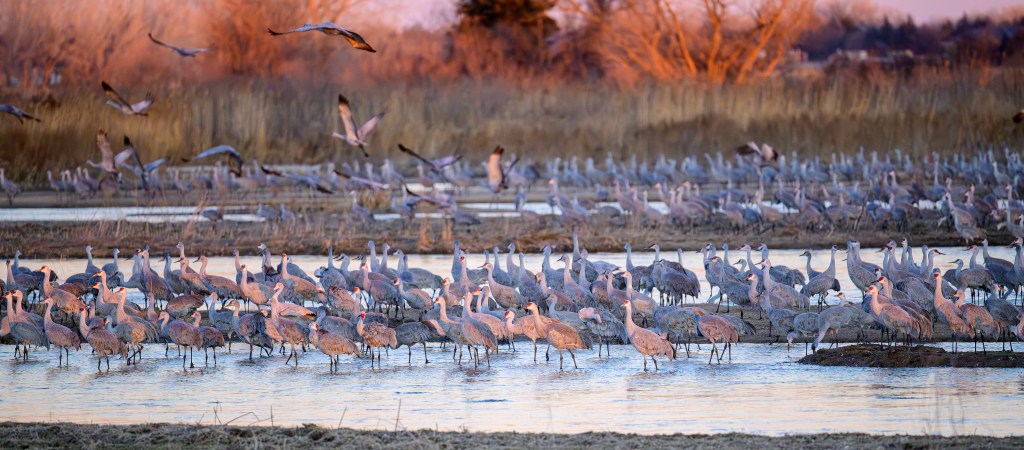
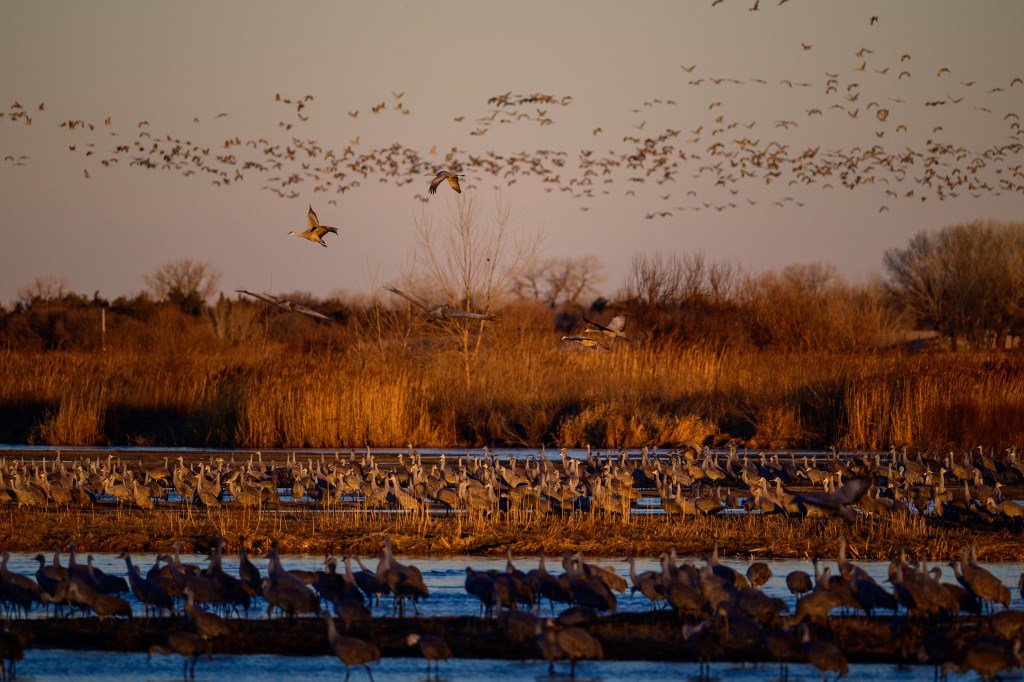
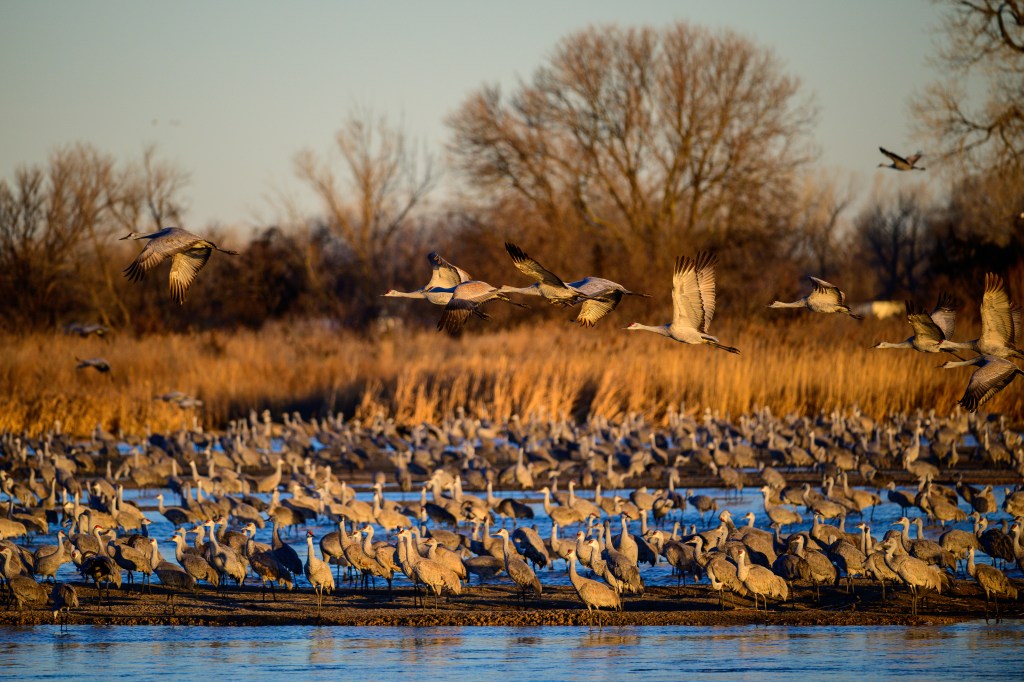
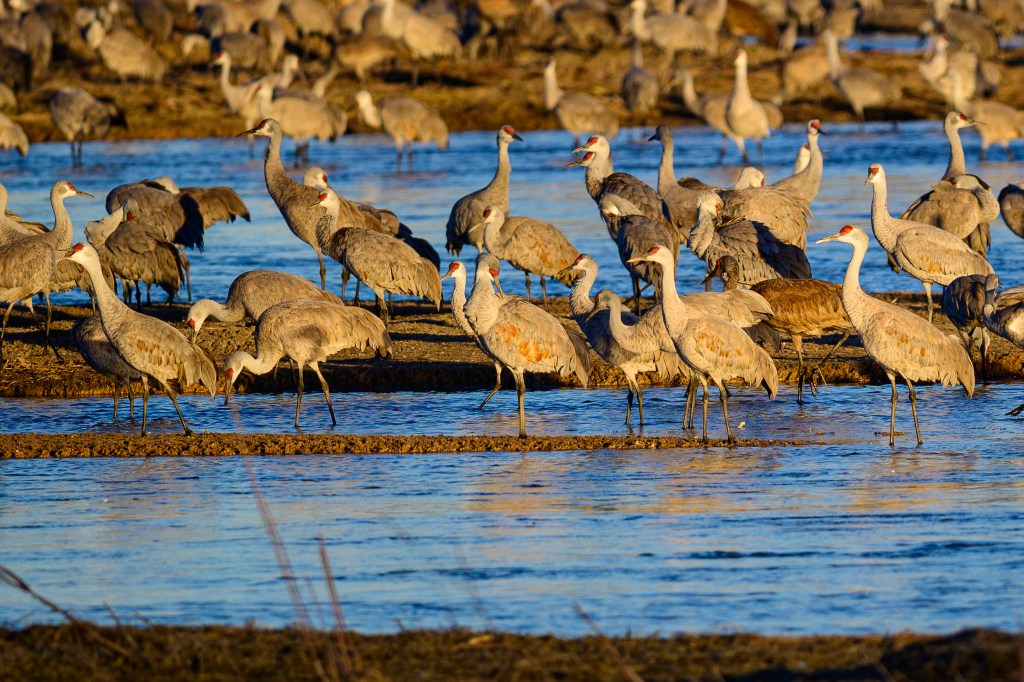
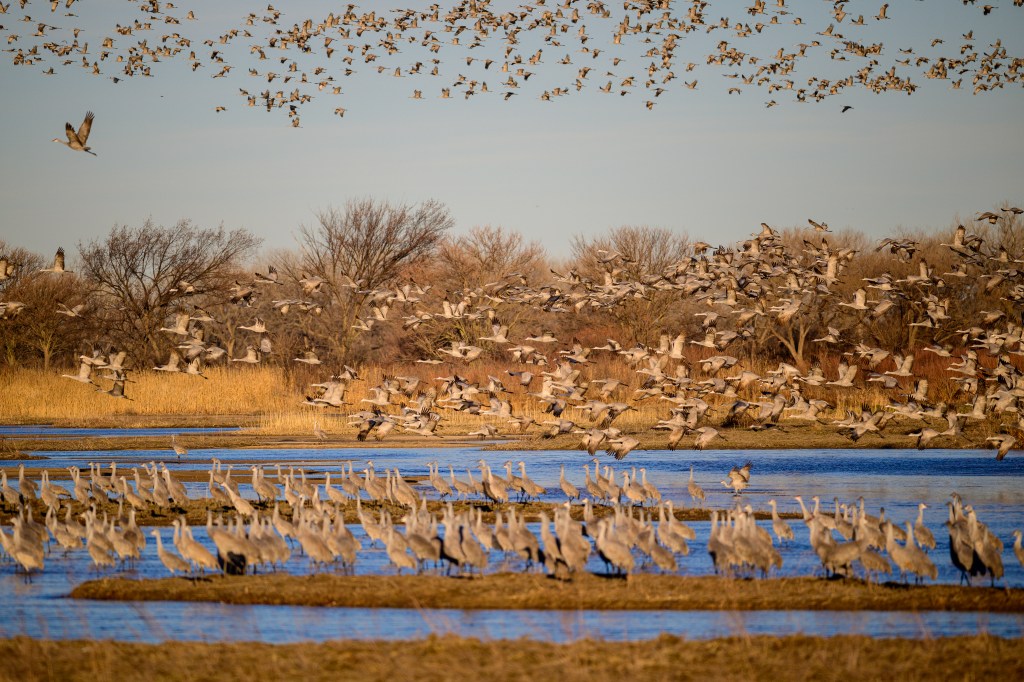
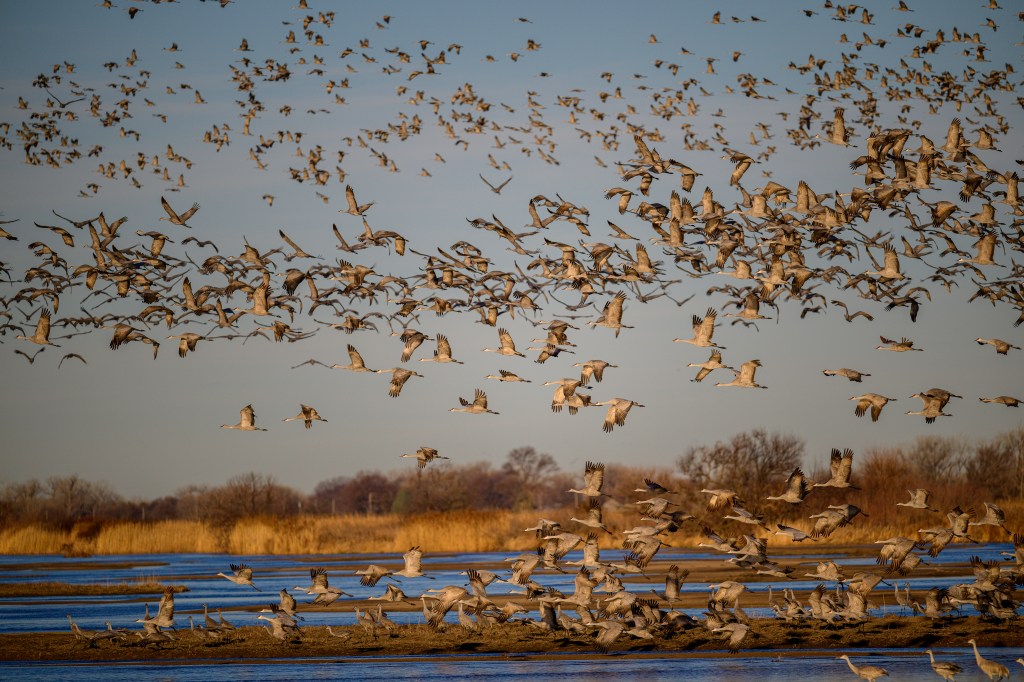
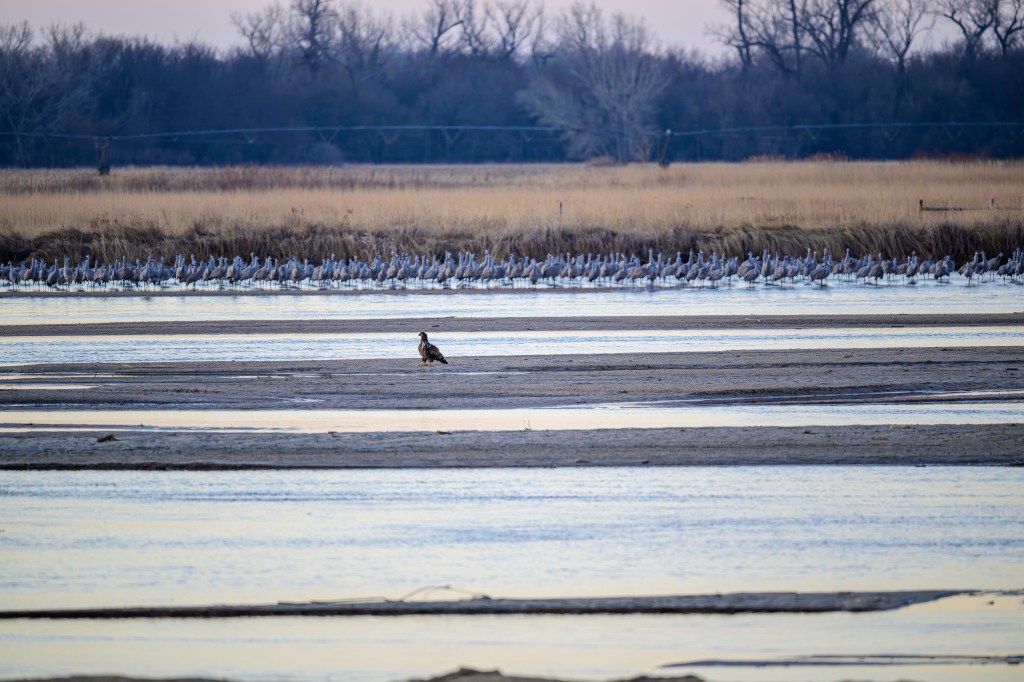
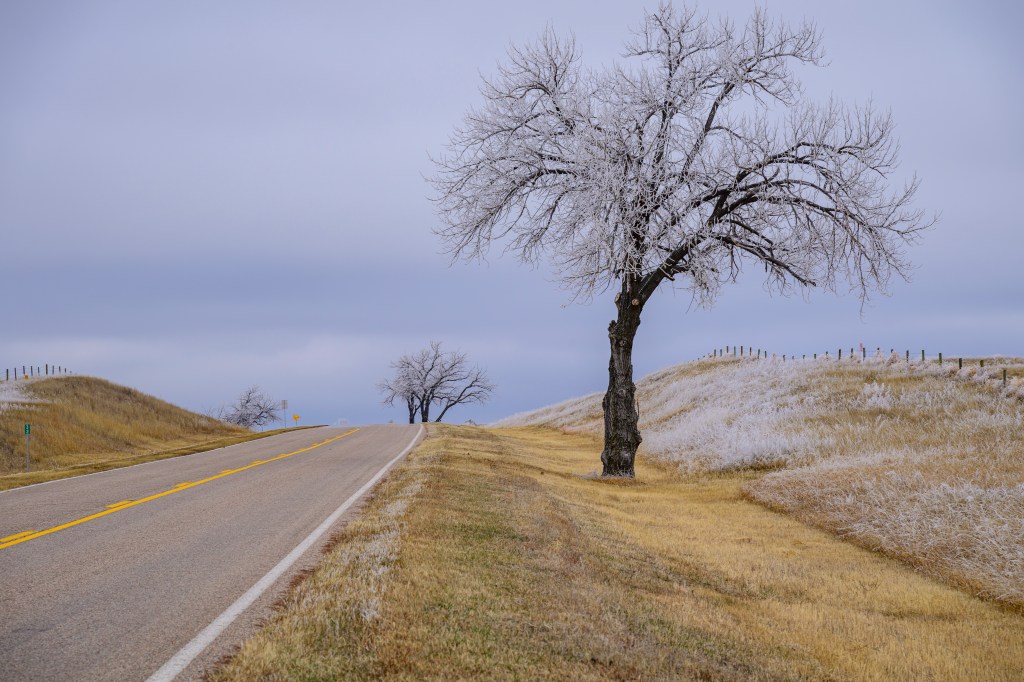
During the spring migration, birds roost for a month in March on a 70-mile stretch of the Platte River in central Nebraska. During this stopover, they add 15% to their body weight and then continue north. Most of central Nebraska is called the Sandhills — sand dunes stabilized by prairie grasses. The cranes are named for this area. The birds spend the nights on open sandbars in the Platte River, away from vegetation that could conceal a predator. During the day they feed in fields and wetlands. Sandhill Cranes have used this migration route and feeding area for thousands of years. During the last two centuries, European immigrants introduced modern agriculture and cranes adapted to eat in fields of alfalfa and unplowed corn stubble.
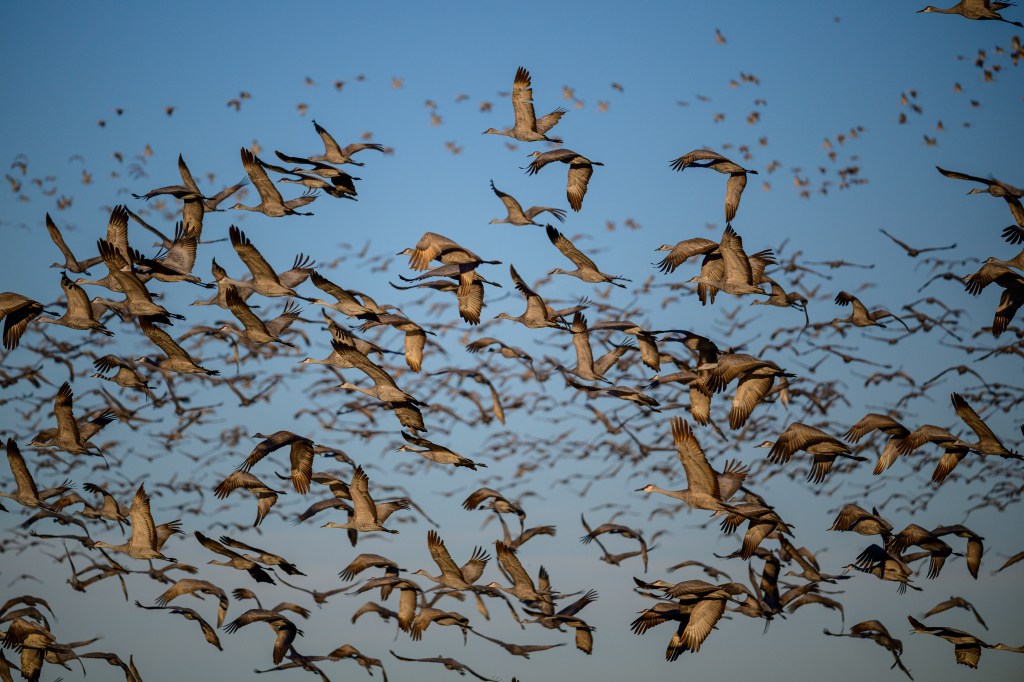
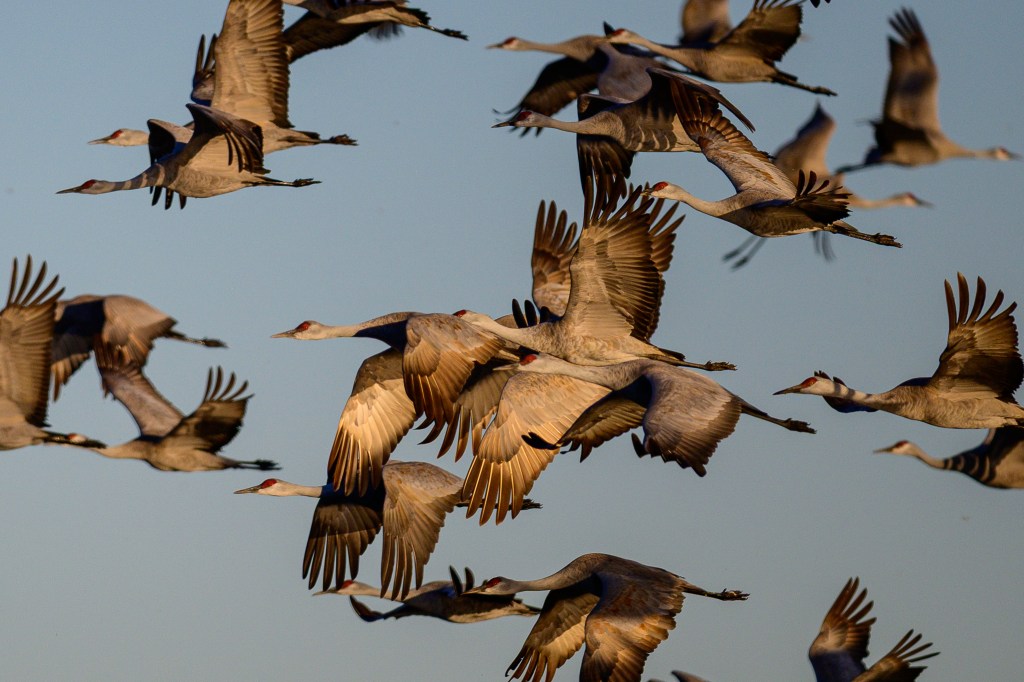
On a recent trip to see this migration, Roberta and I spent time at two crane sanctuaries near Kearney Nebraska. People told us that the number of migrating Cranes was half a million, or 700,000, or 1 million, or 1.5 million. According to Birds of the World, the Cornell Ornithology Lab website, the mid-Continent population was estimated as >=560,000 in a 1992 study and 356,742 in 2012. Whatever the true number, you can easily see thousands. We spent March 5 to 8 in Kearney and observed cranes from blinds in the morning and evening. I took over 16,000 photos (ridiculous, I admit) and have selected a few for this blog.
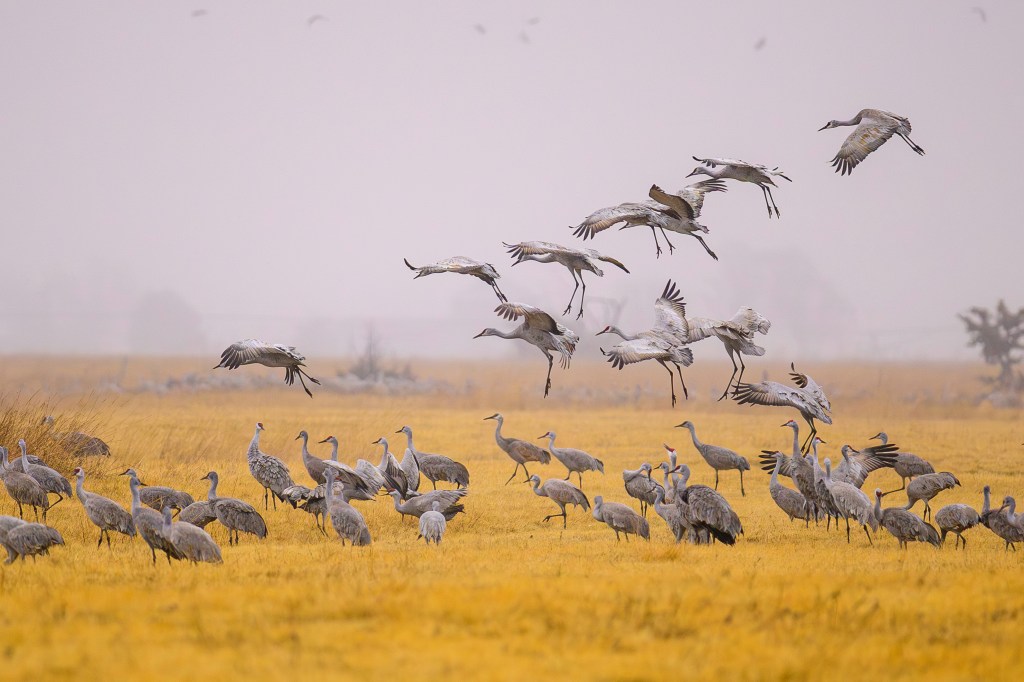
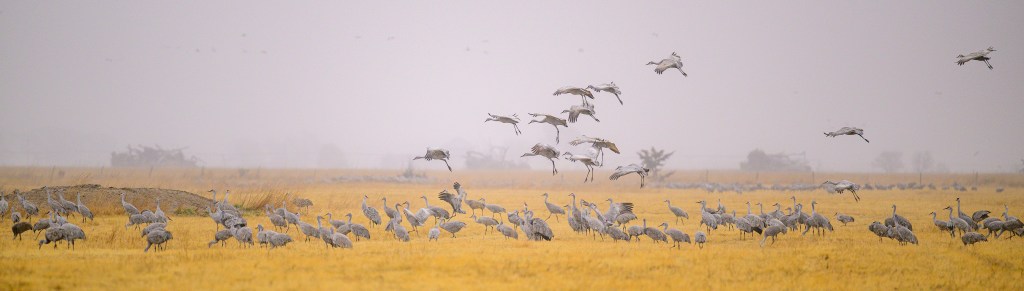
MARCH 6
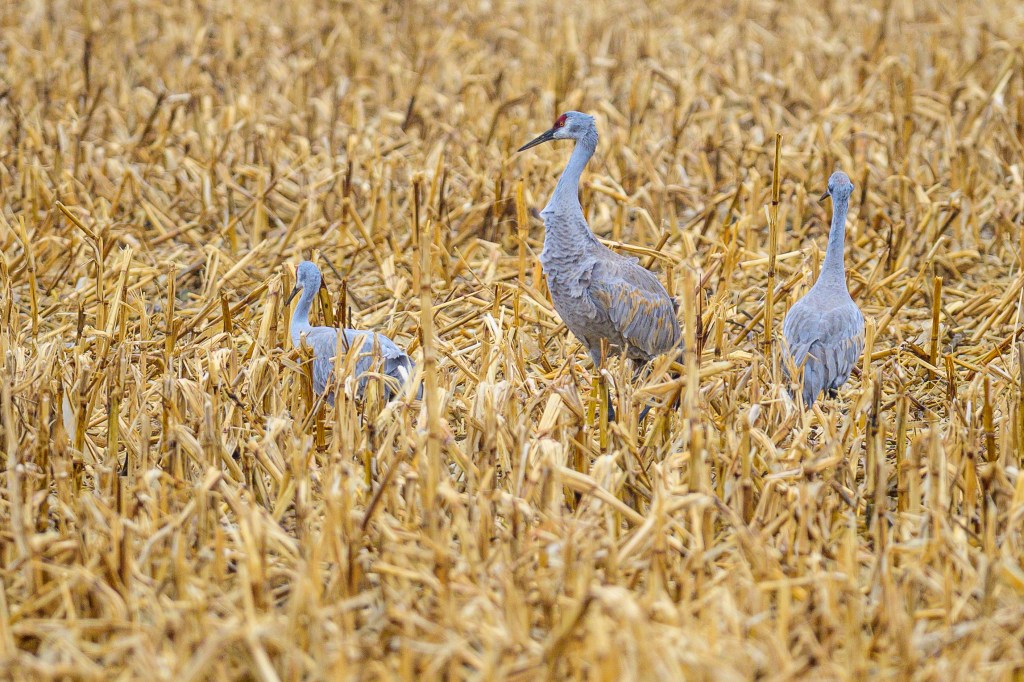
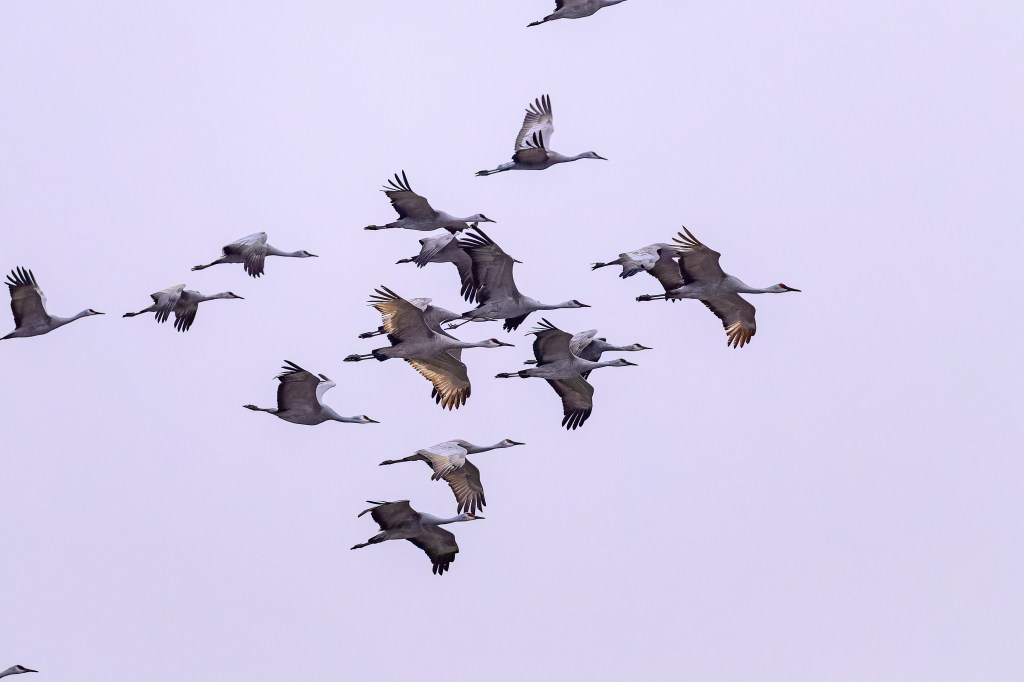
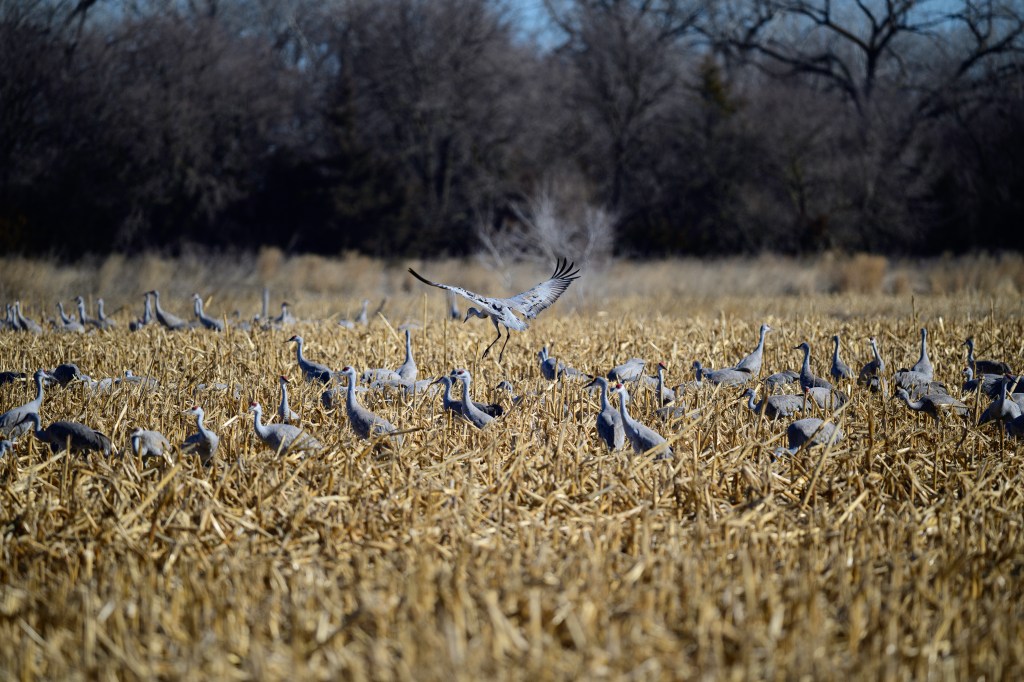
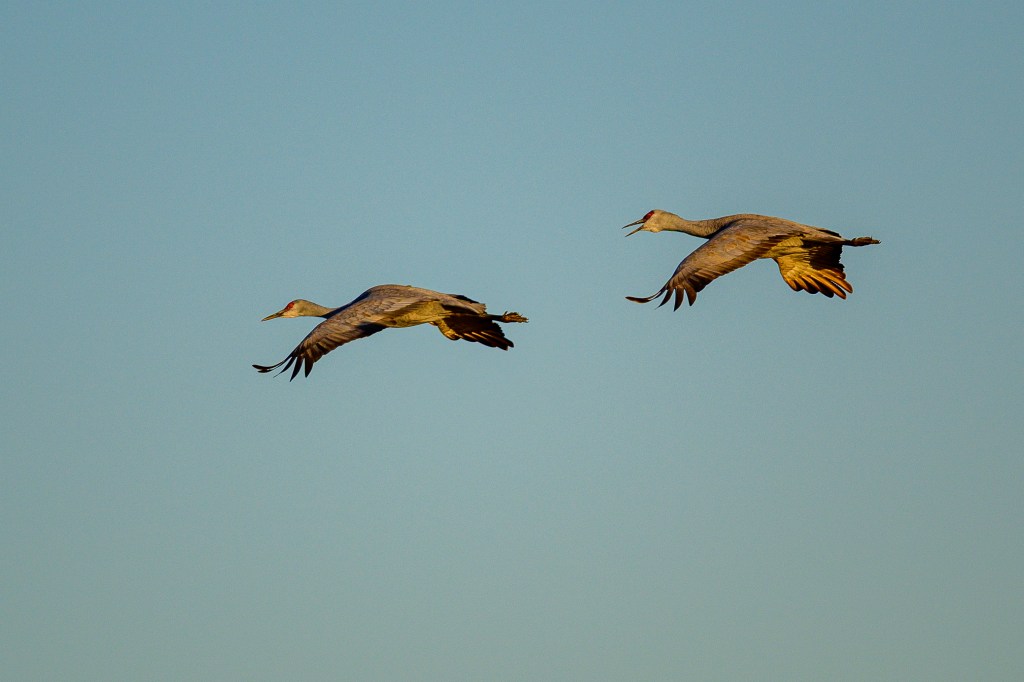
It was foggy that morning and I photographed Cranes in fields and corn stubble:
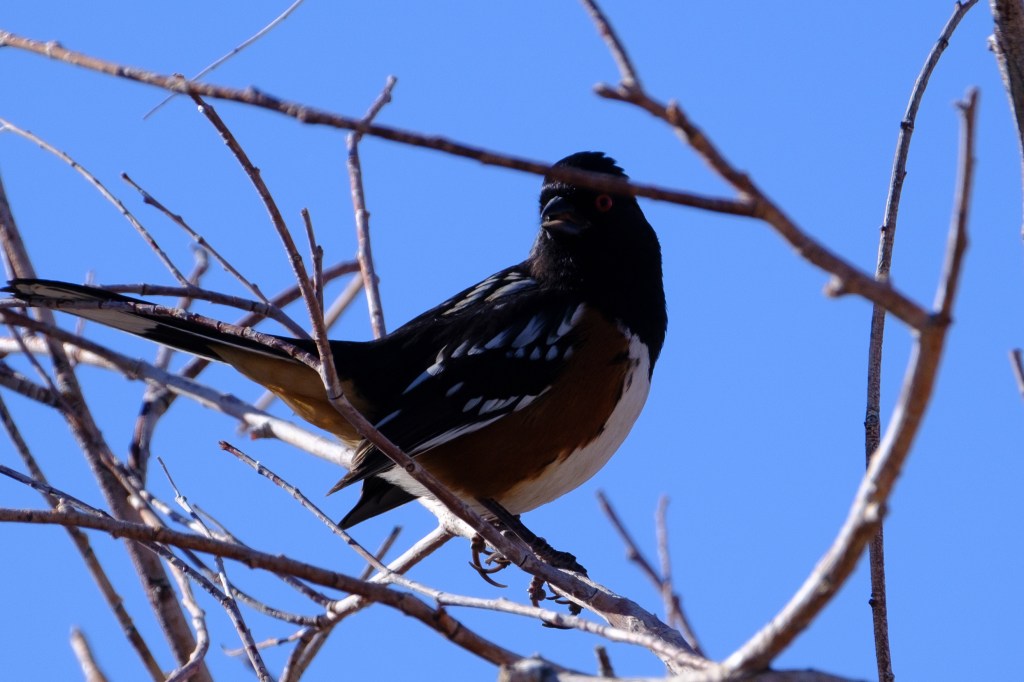
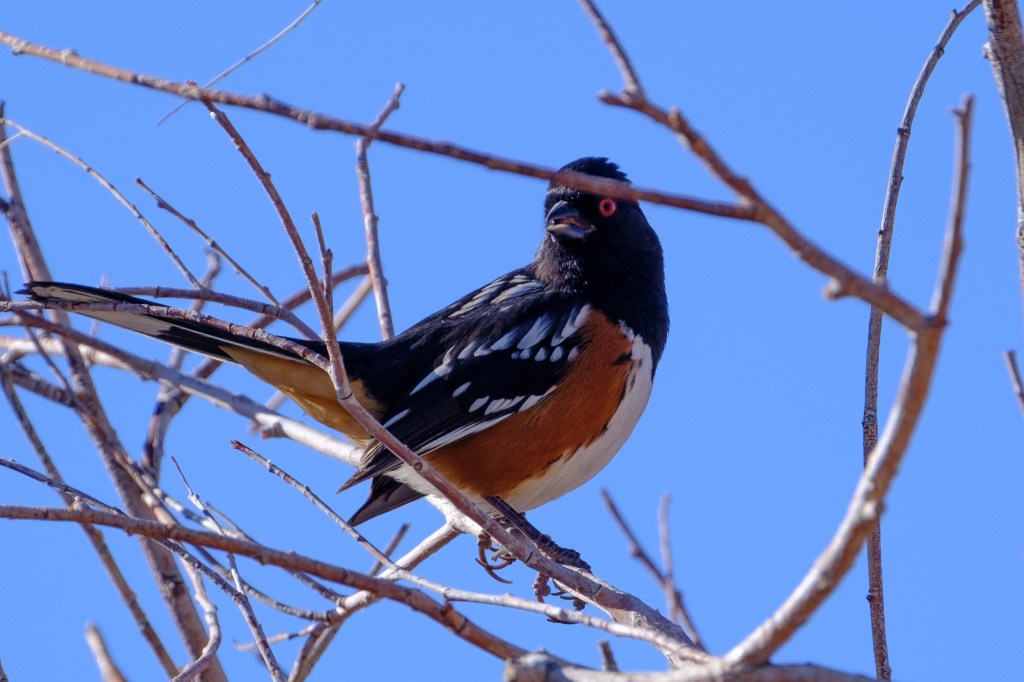
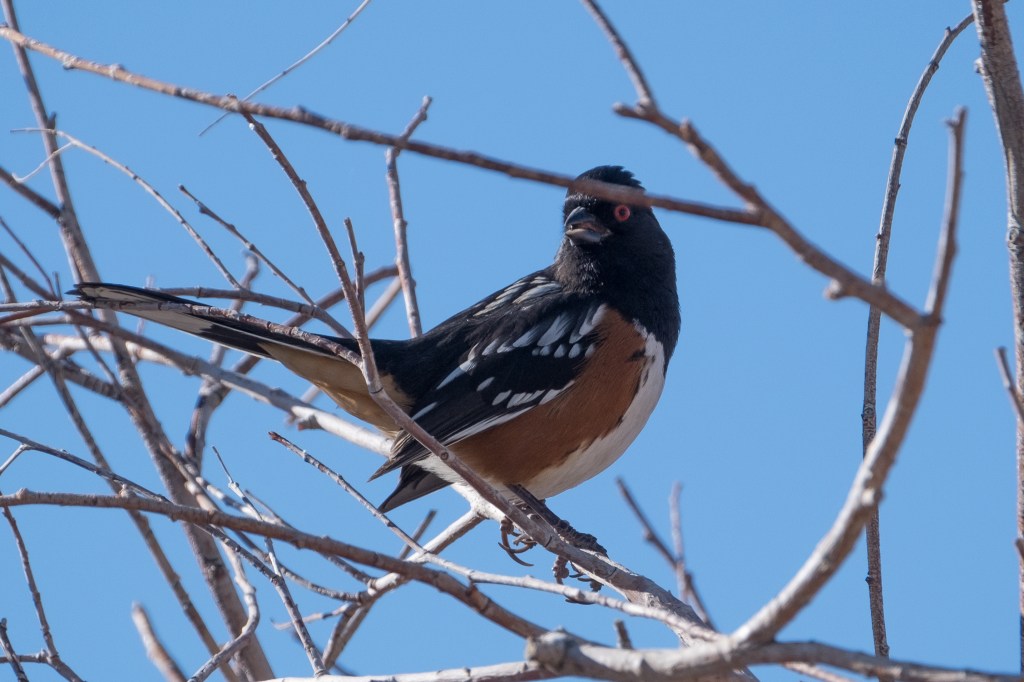
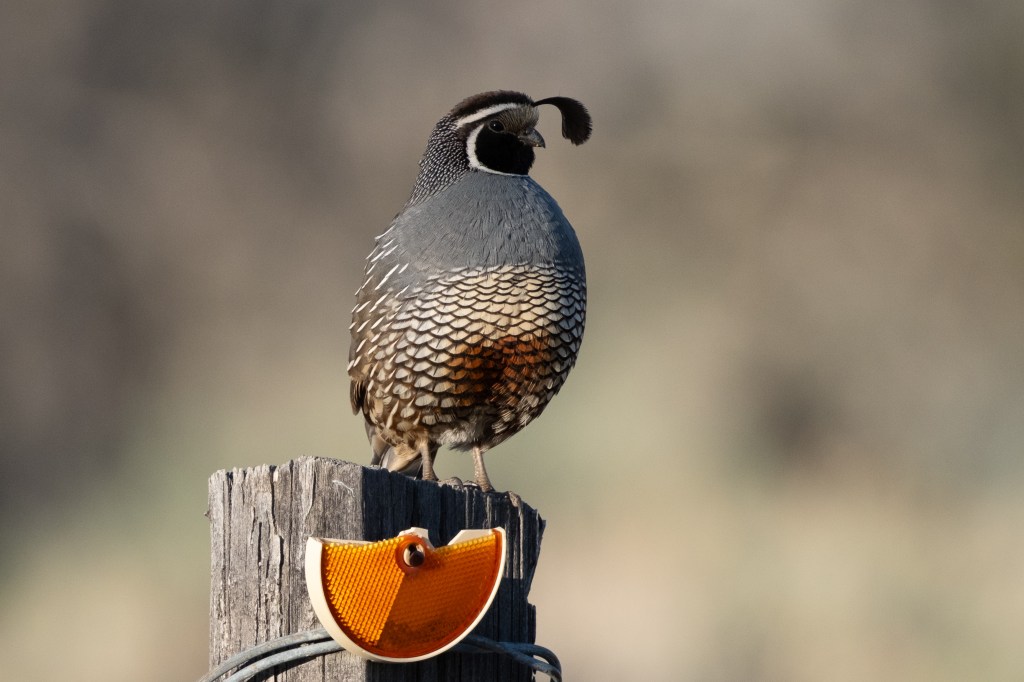
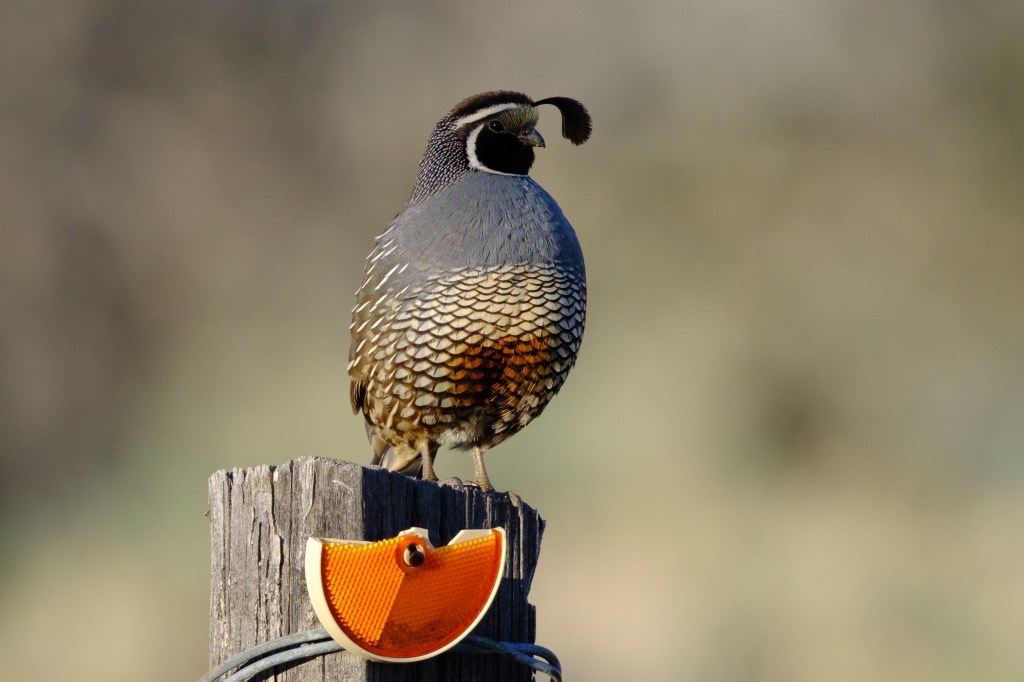
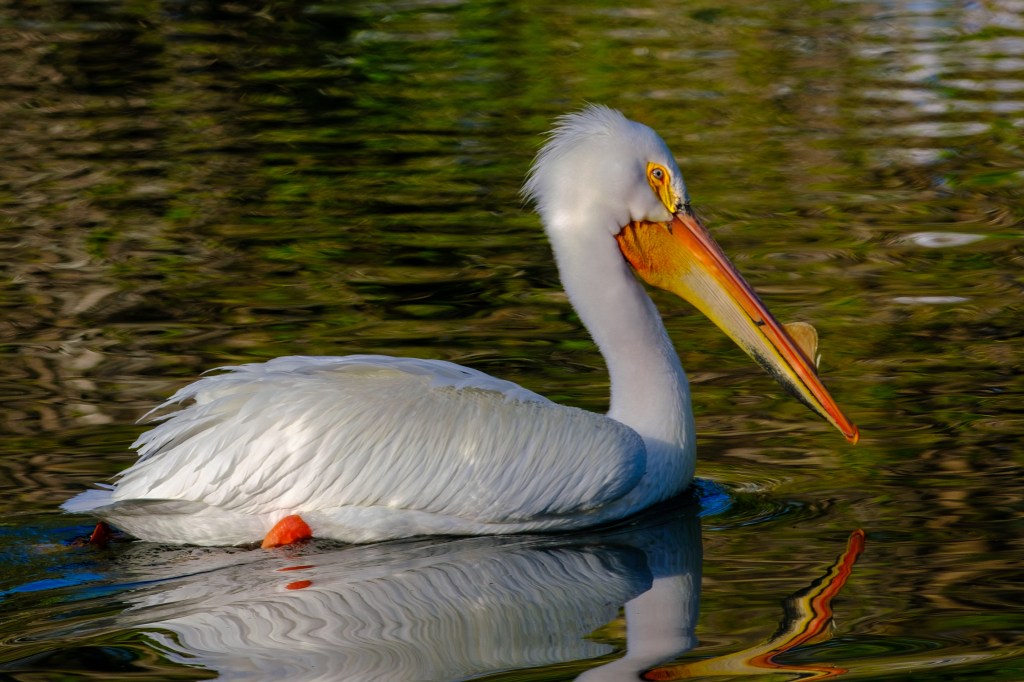
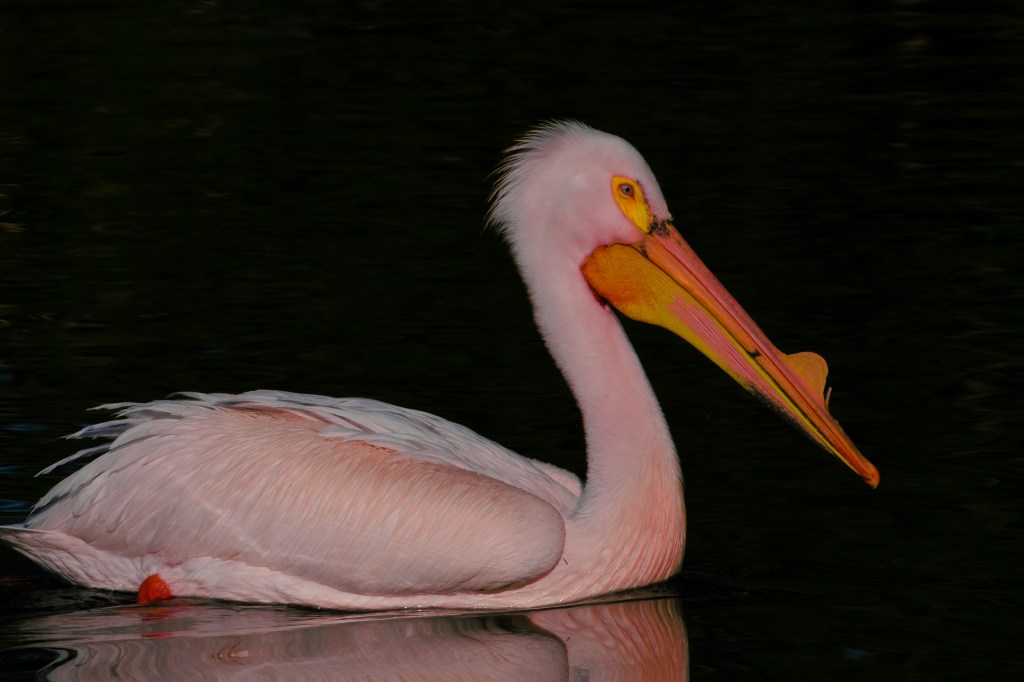
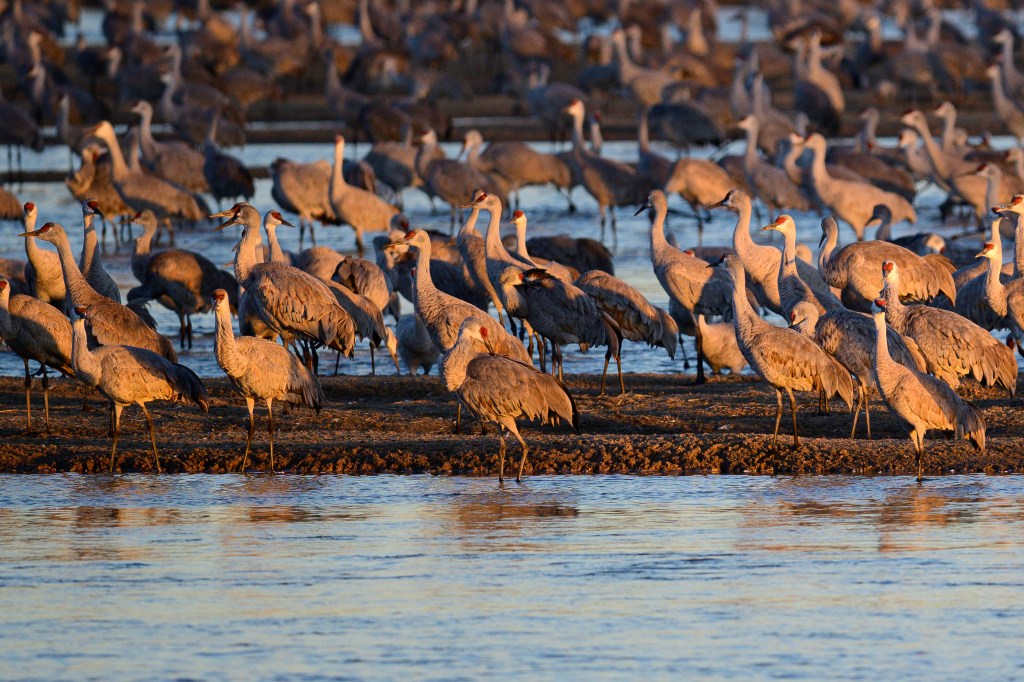
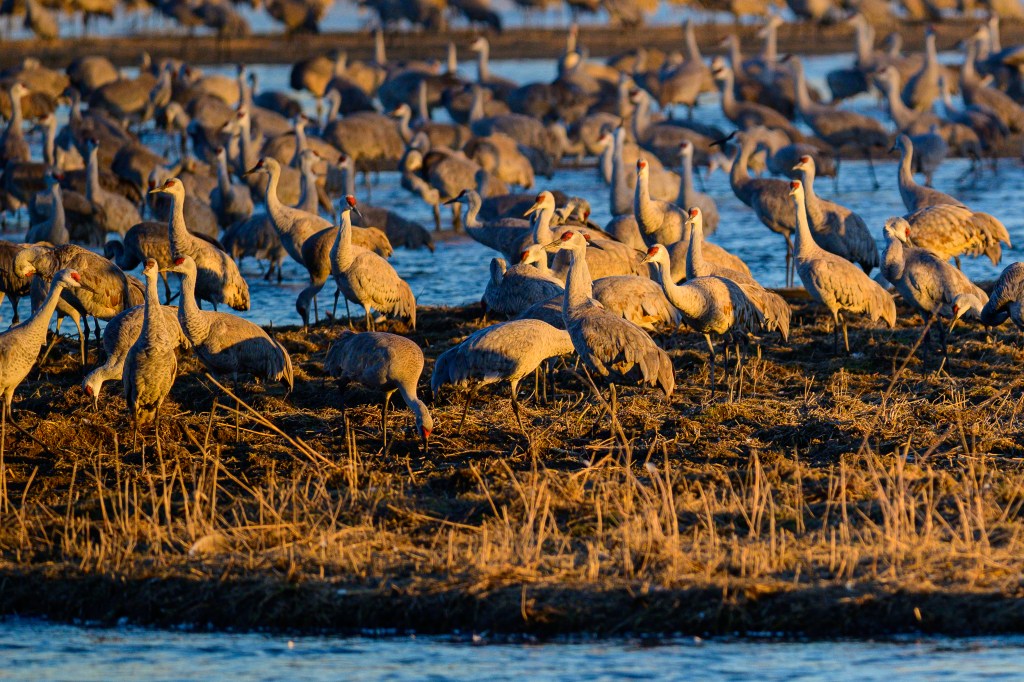
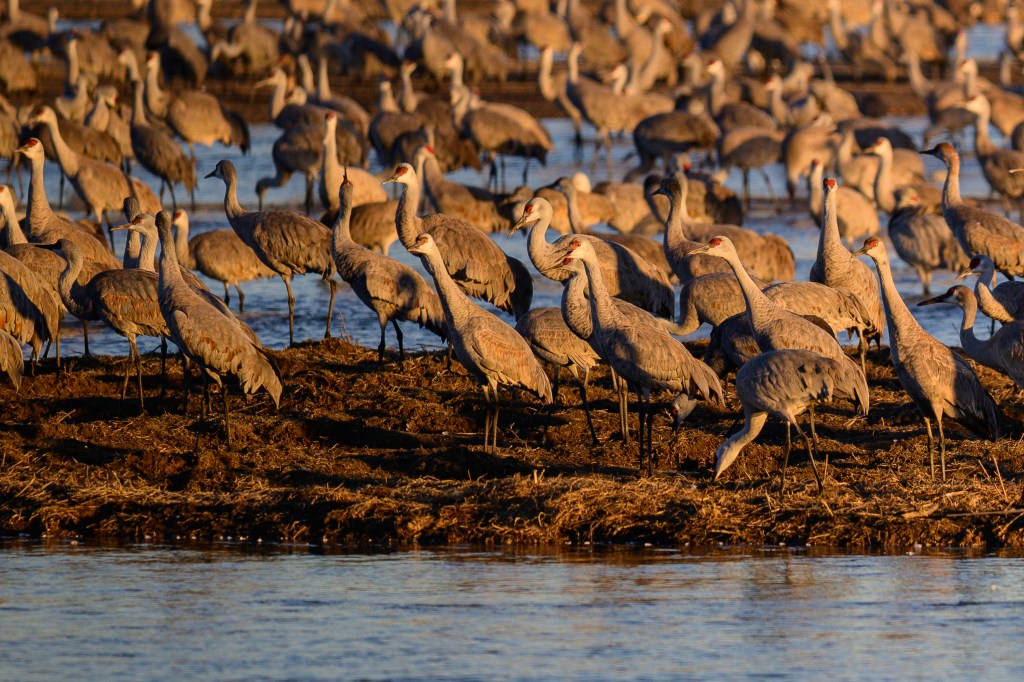
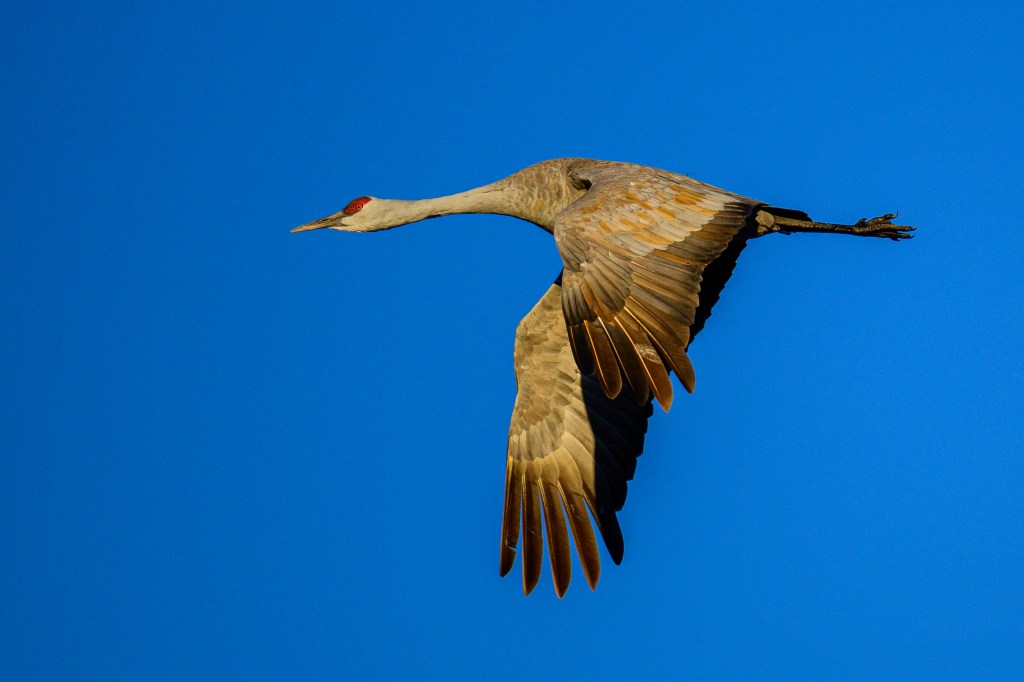
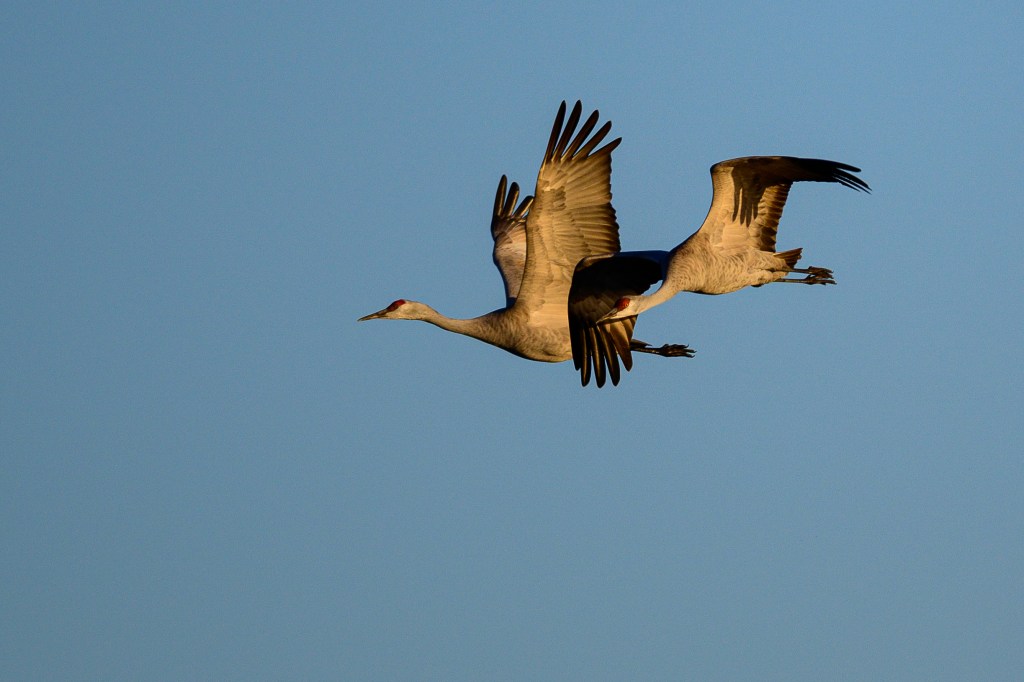
The photo below shows the plumage of a Sandhill. The red forehead is bare skin, eyes are yellow, the grey feathers of the “bustle” have brown stains.
Two centuries ago the Platte would flood each spring, ripping out trees and plants and creating ideal locations for the Cranes to congregate for the night. The name “Platte” is derived from French and German words that mean flat or plate-like. It used to be said that the river was a mile wide and an inch deep. Most of the river has now been diverted to irrigation and the floods are reduced; now sanctuaries use bulldozers to clear land for the Cranes.
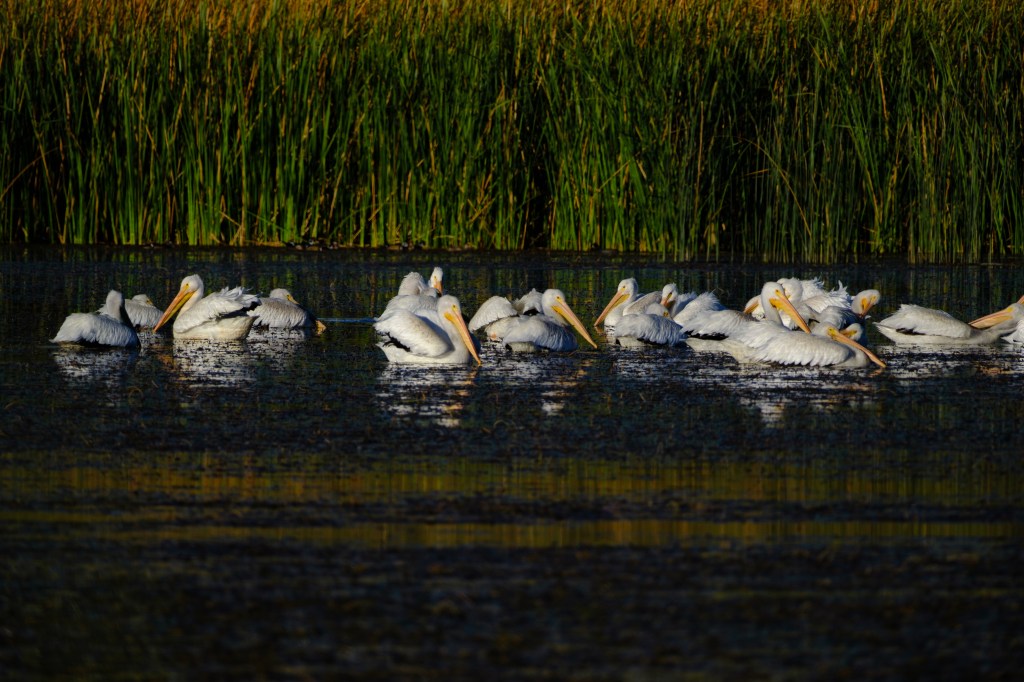
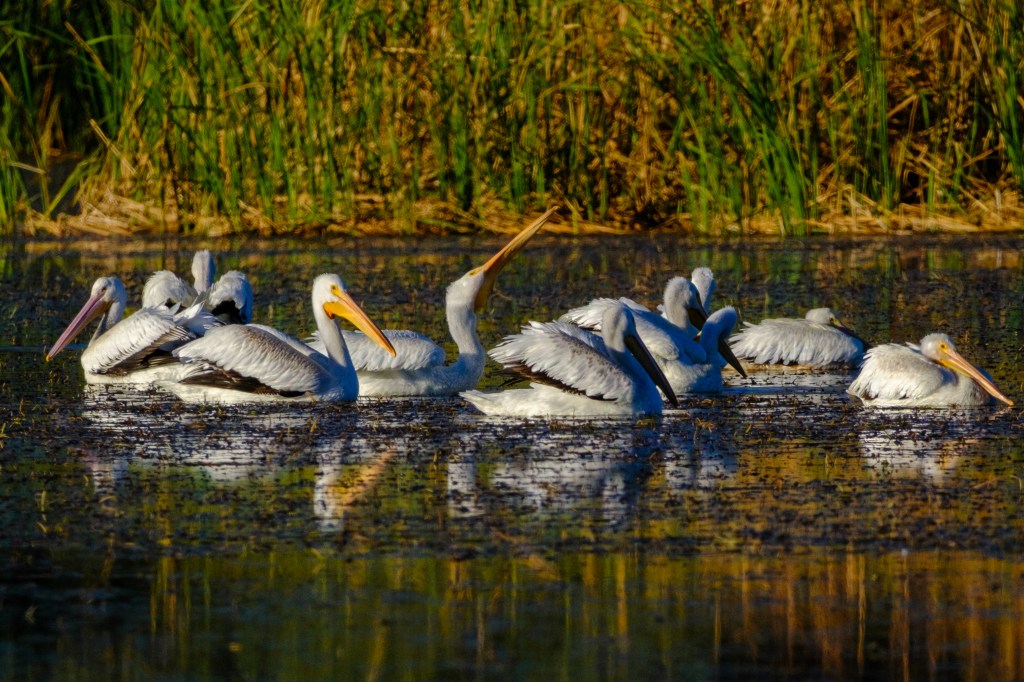
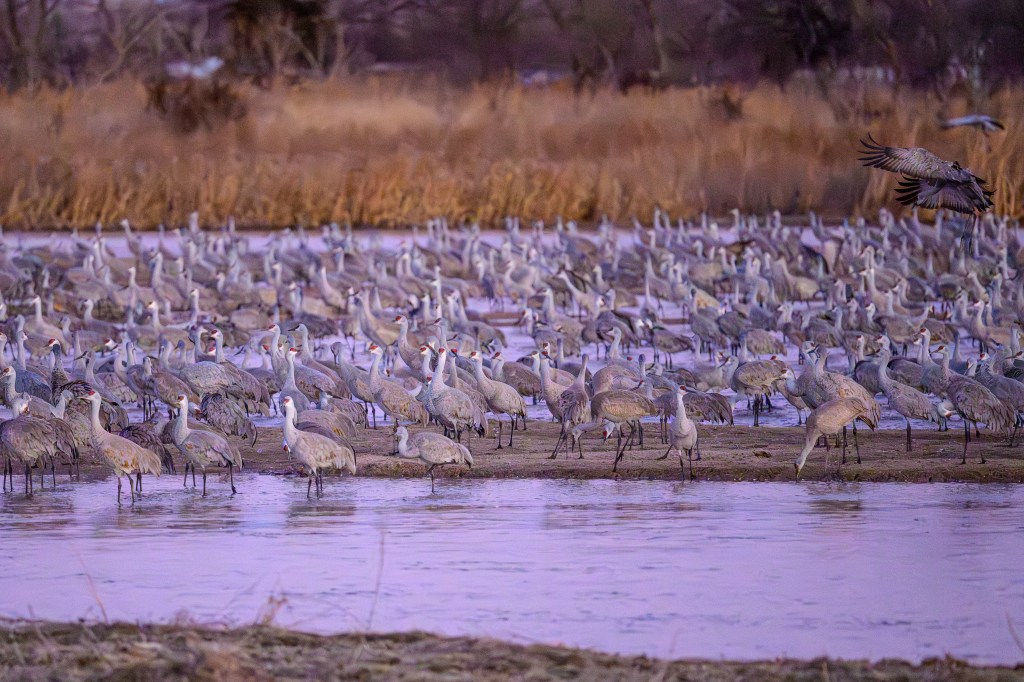
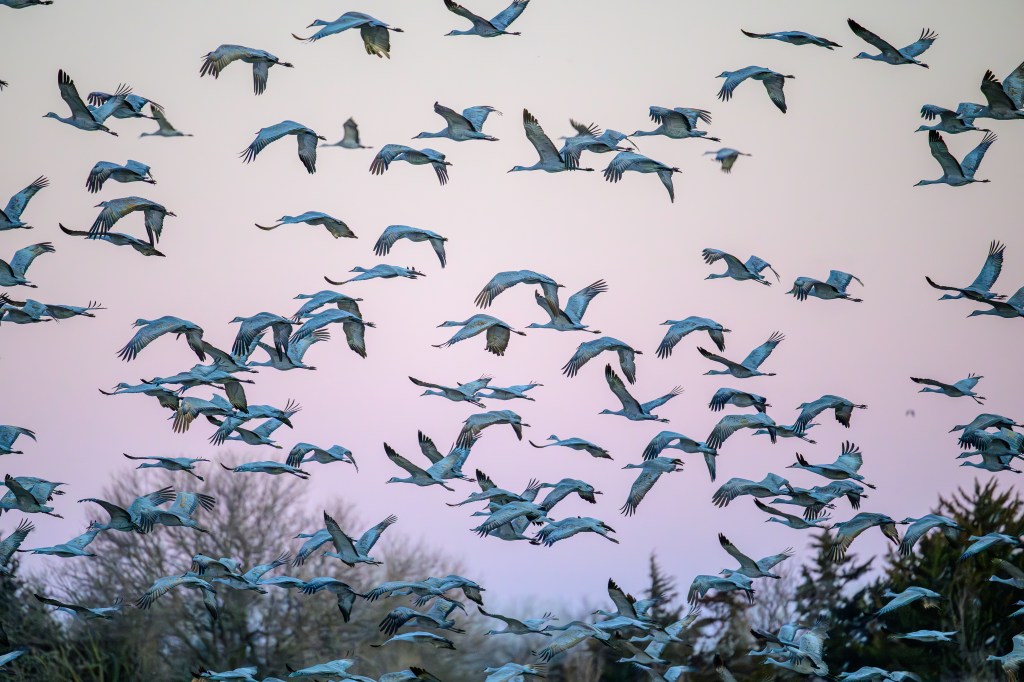
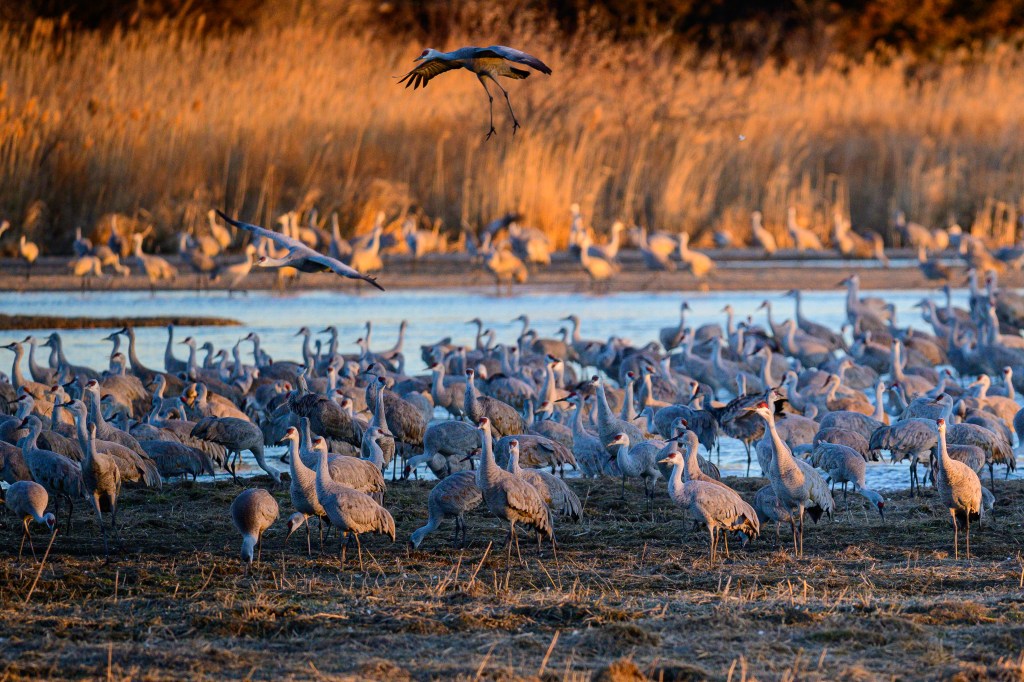
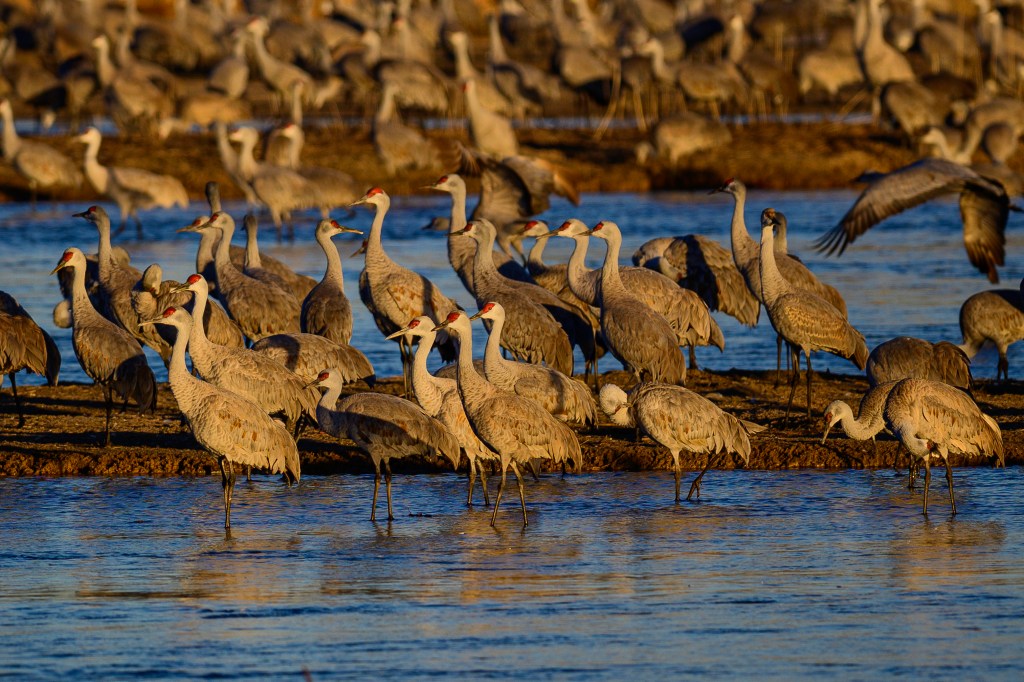
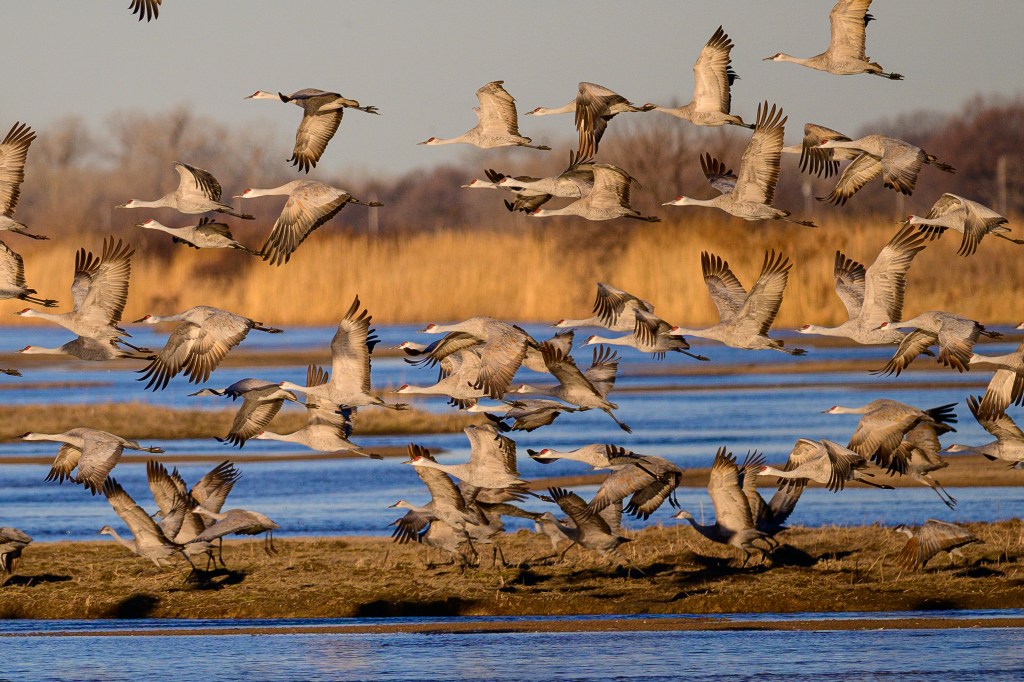
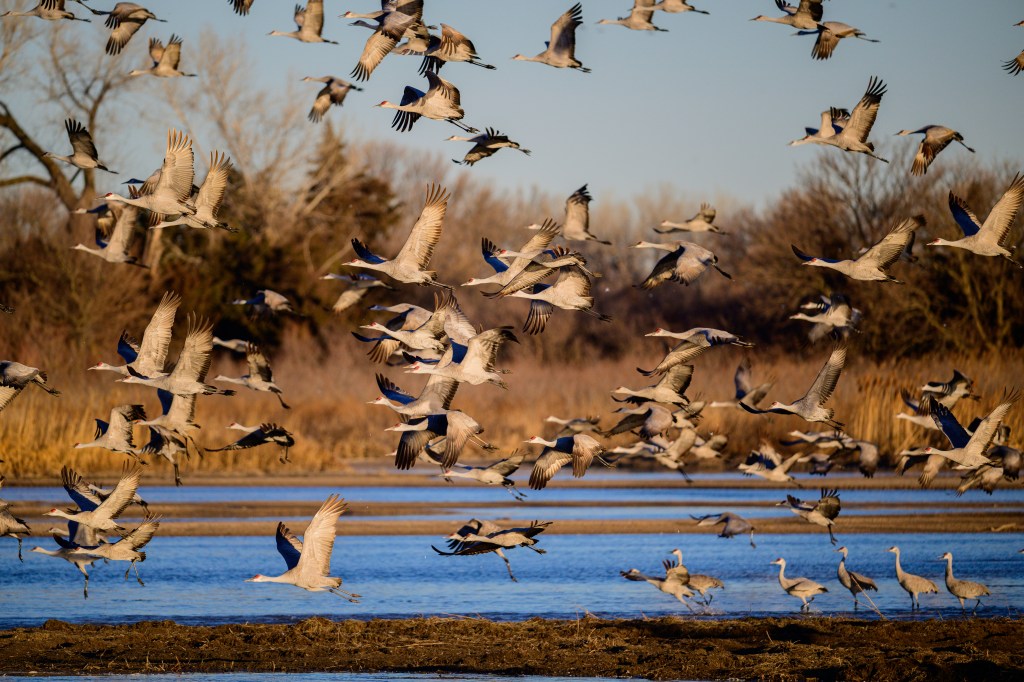
In the evening, we entered a blind at the Rowe Sanctuary. As the light faded, hundreds, then thousands of birds landed on sandbars in front of us.
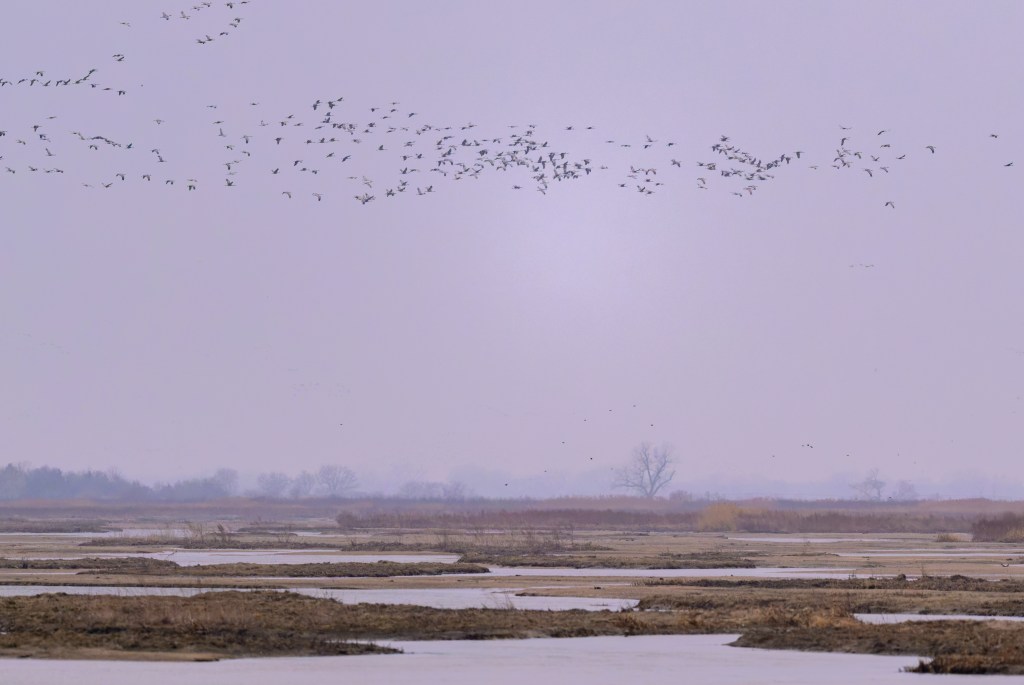
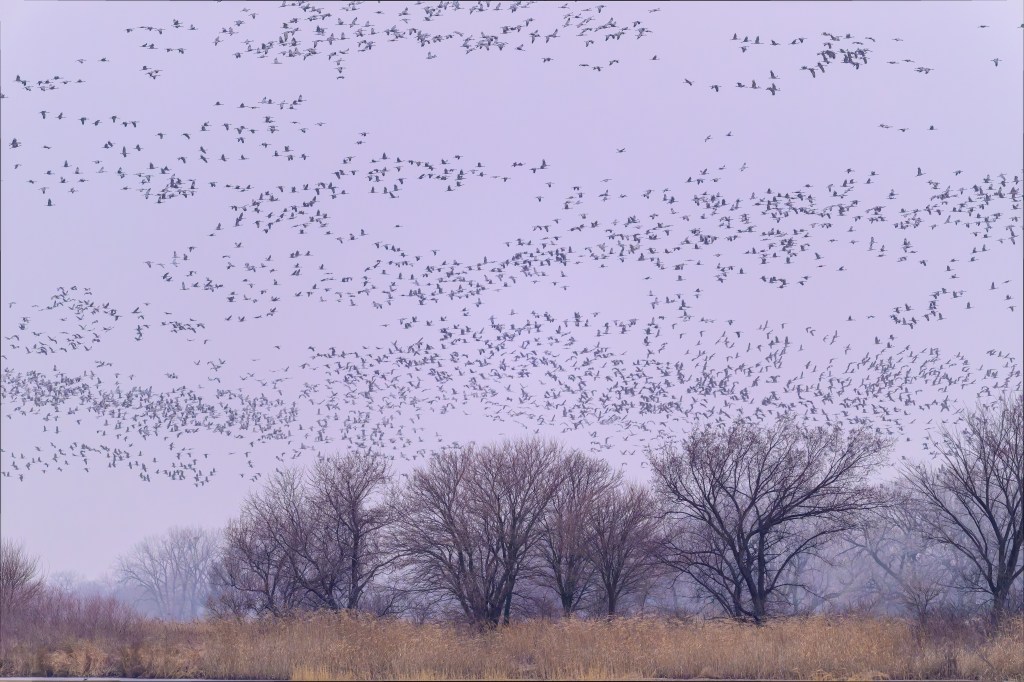
MARCH 7
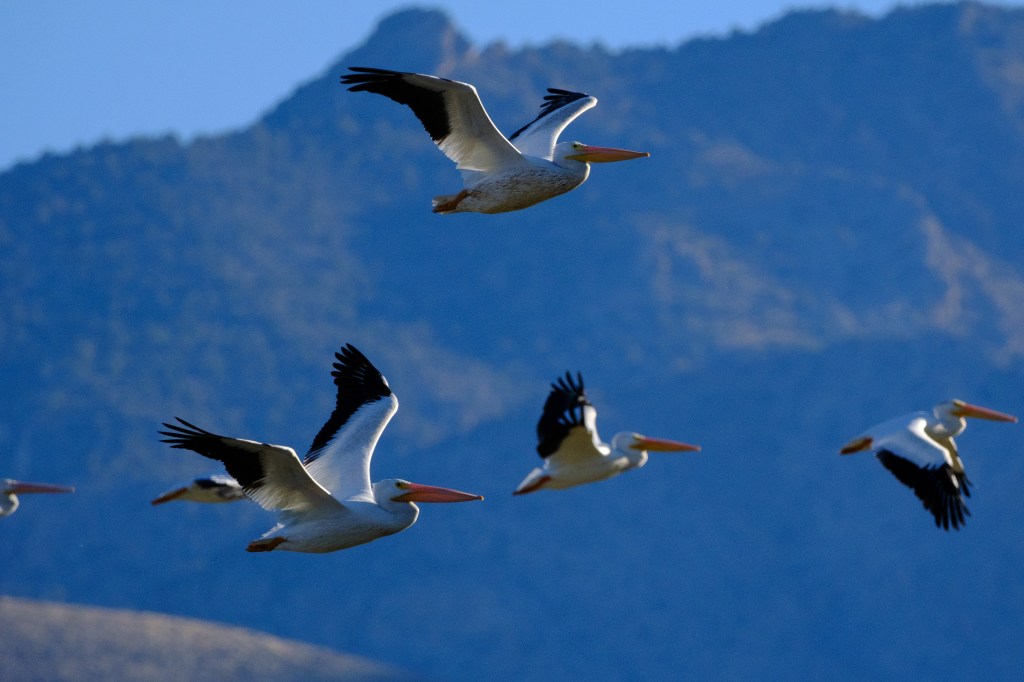
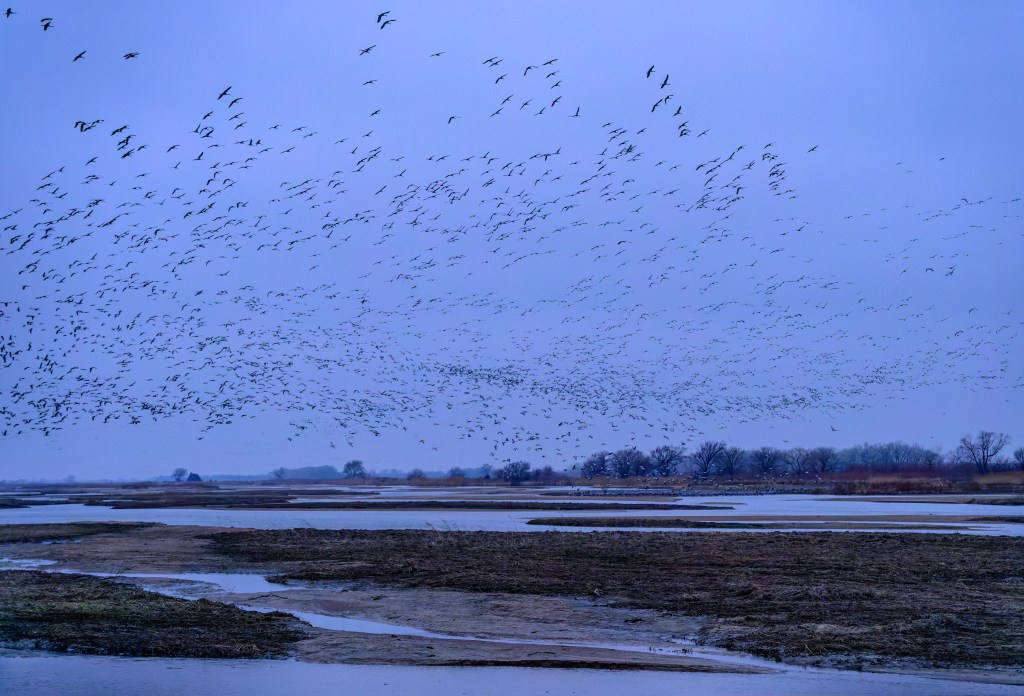
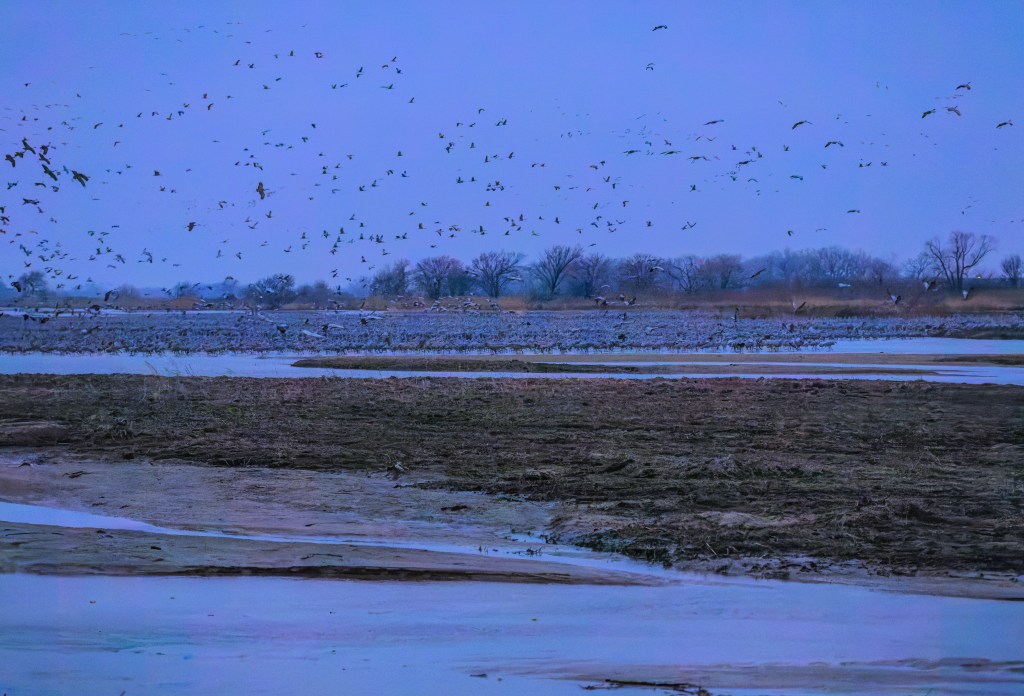
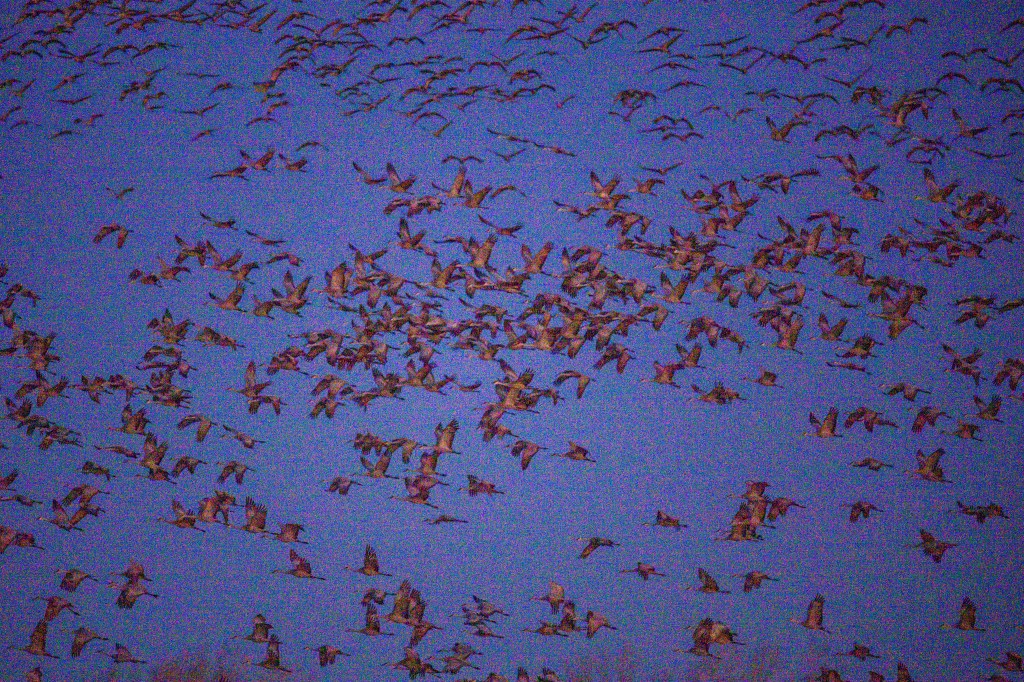
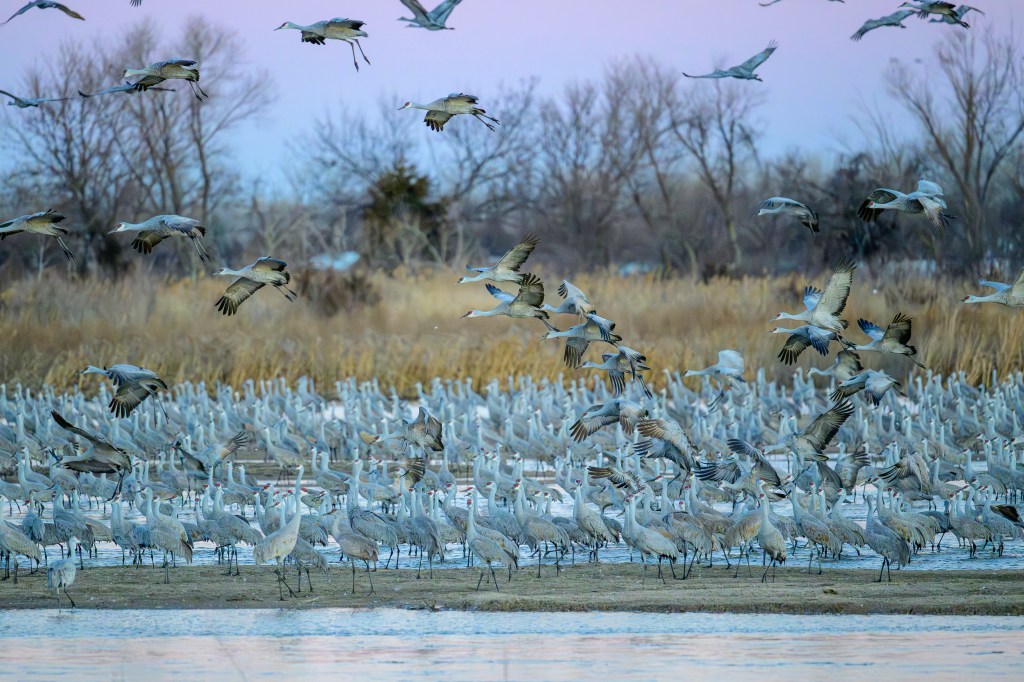
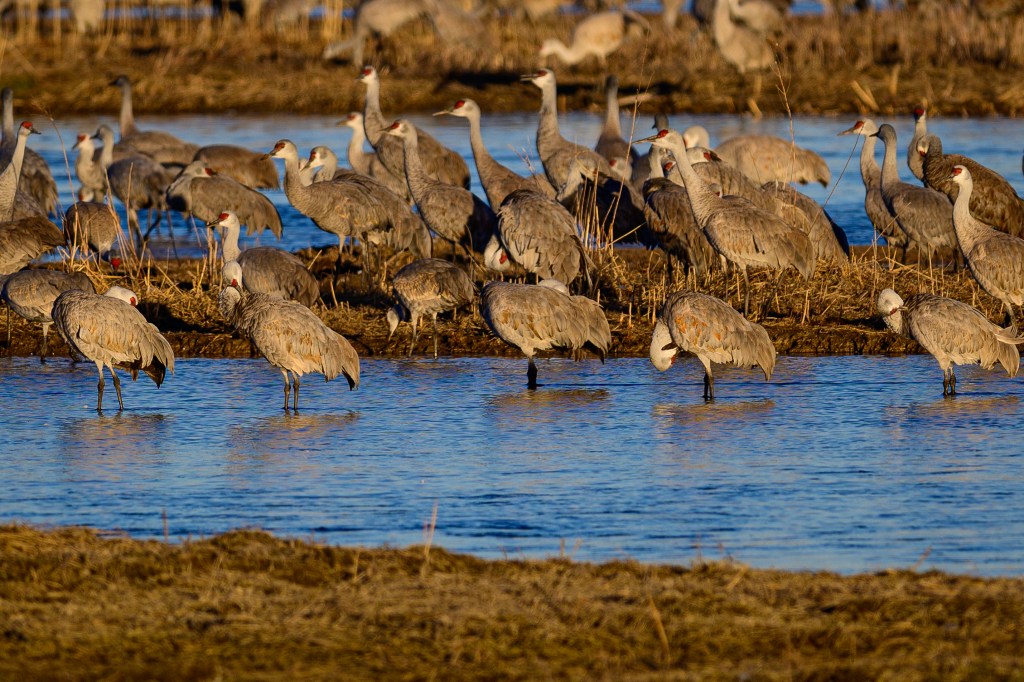
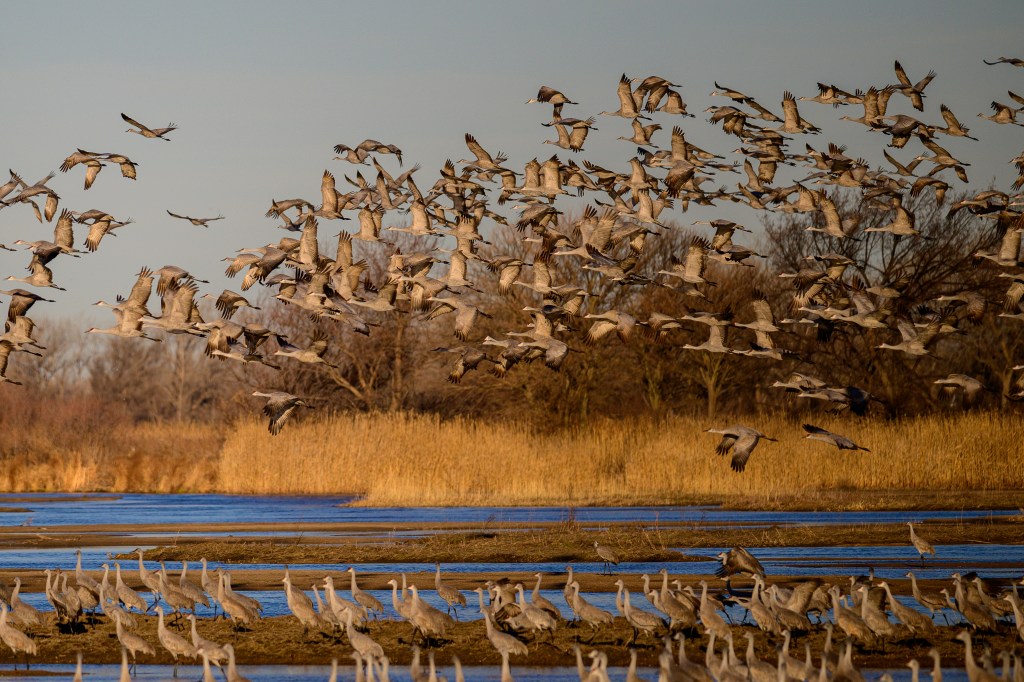
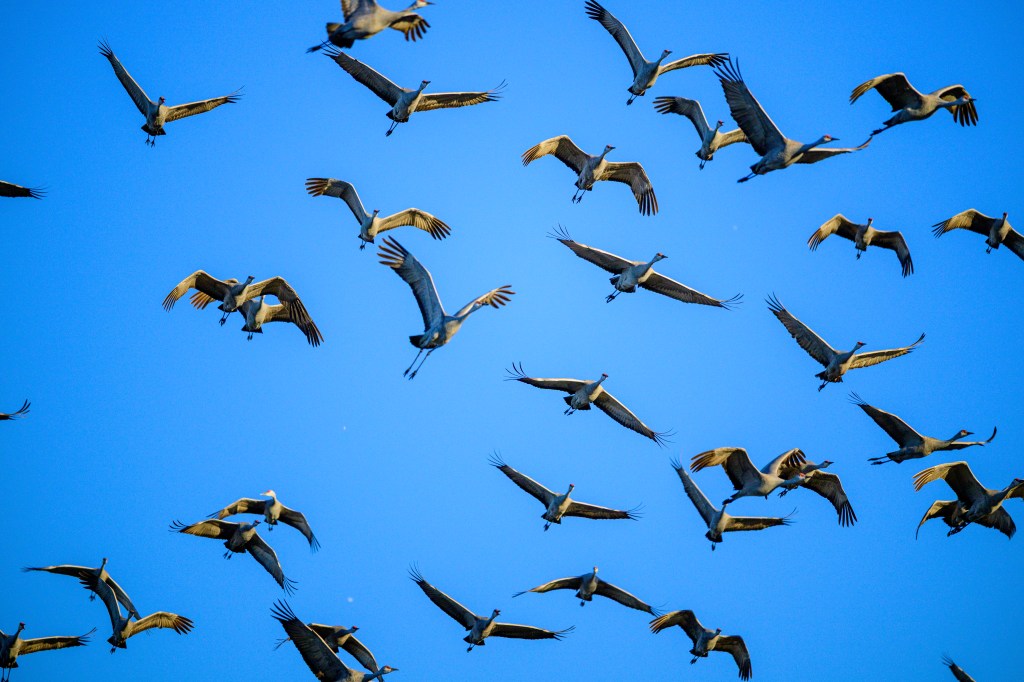
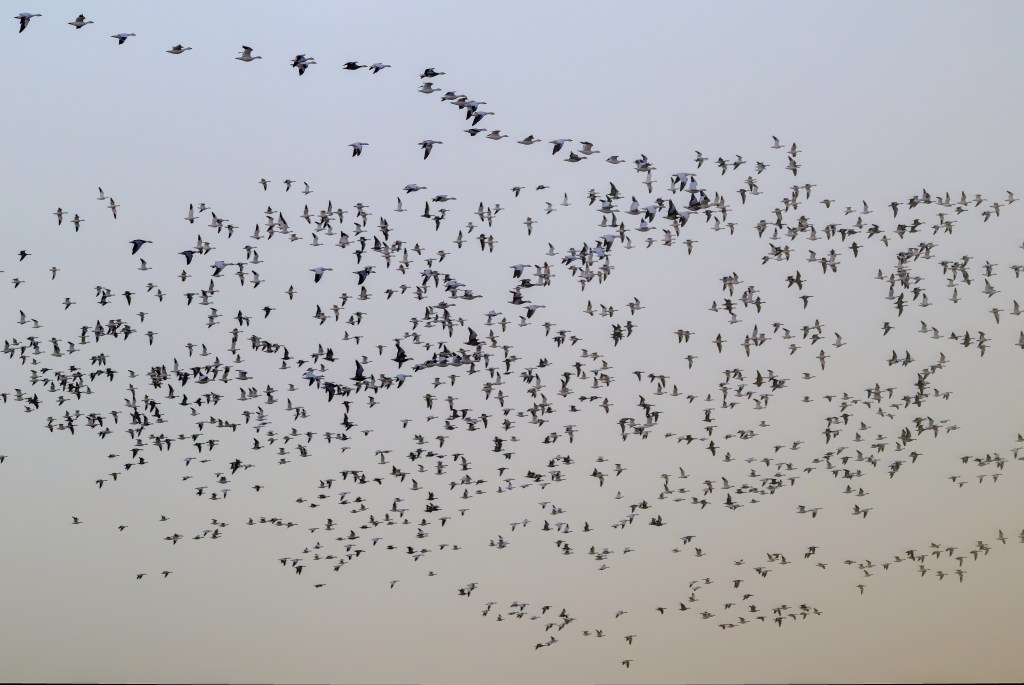
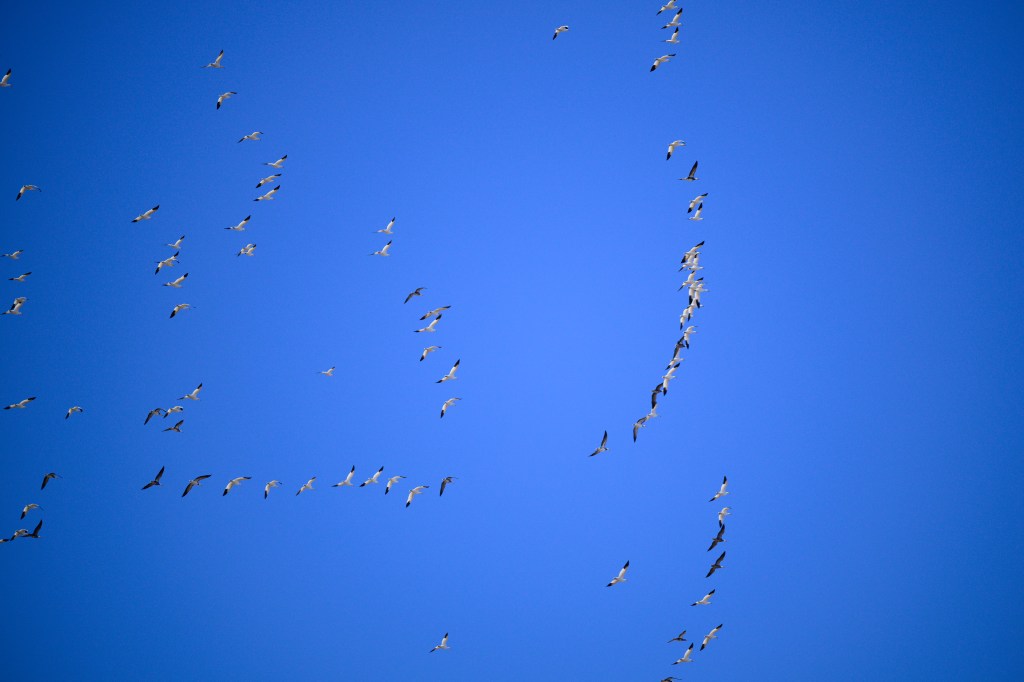
We got up at 3:30 am and drove to a blind at the Crane Trust. As the sun rose we could see hundreds (maybe thousands?) of Cranes on the river. The long lines of birds in the sky may be Cranes, but some could be Snow Geese, which also migrate through this area.
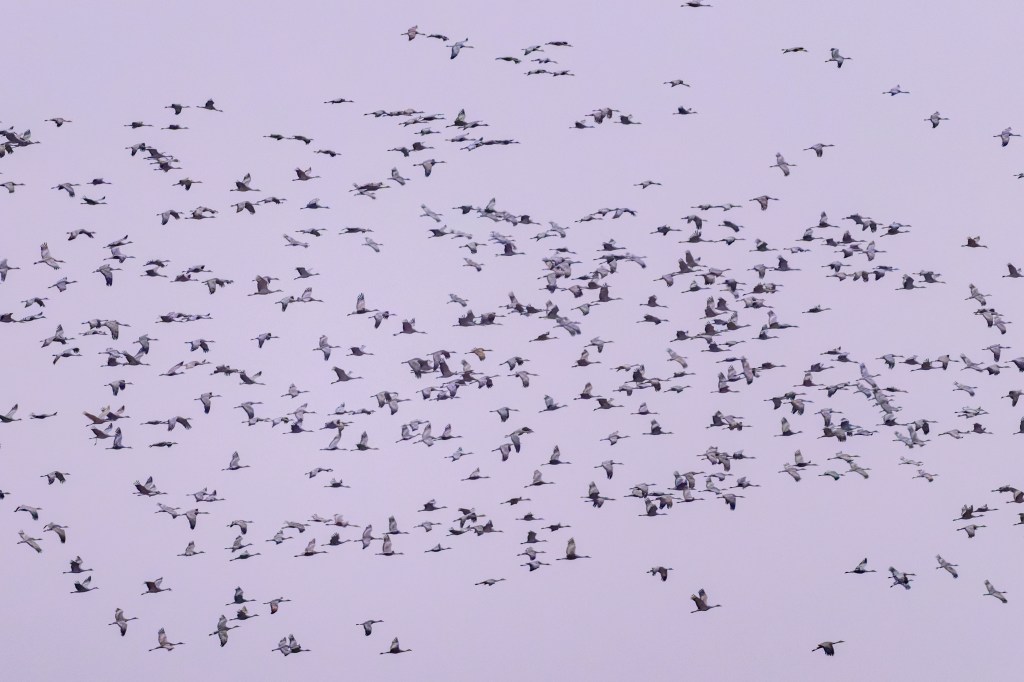
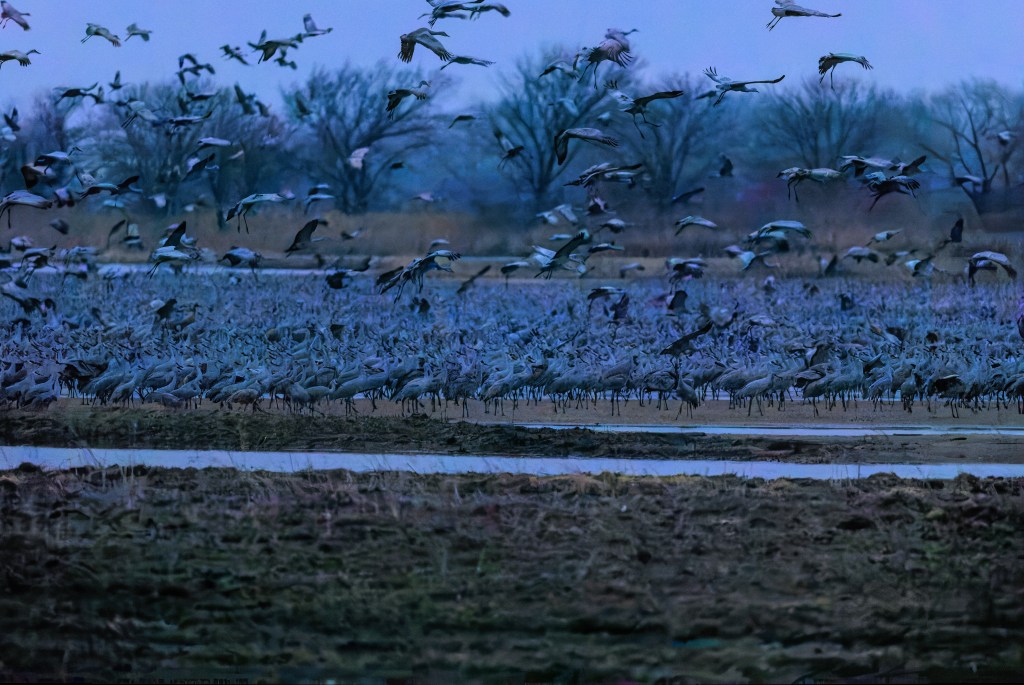
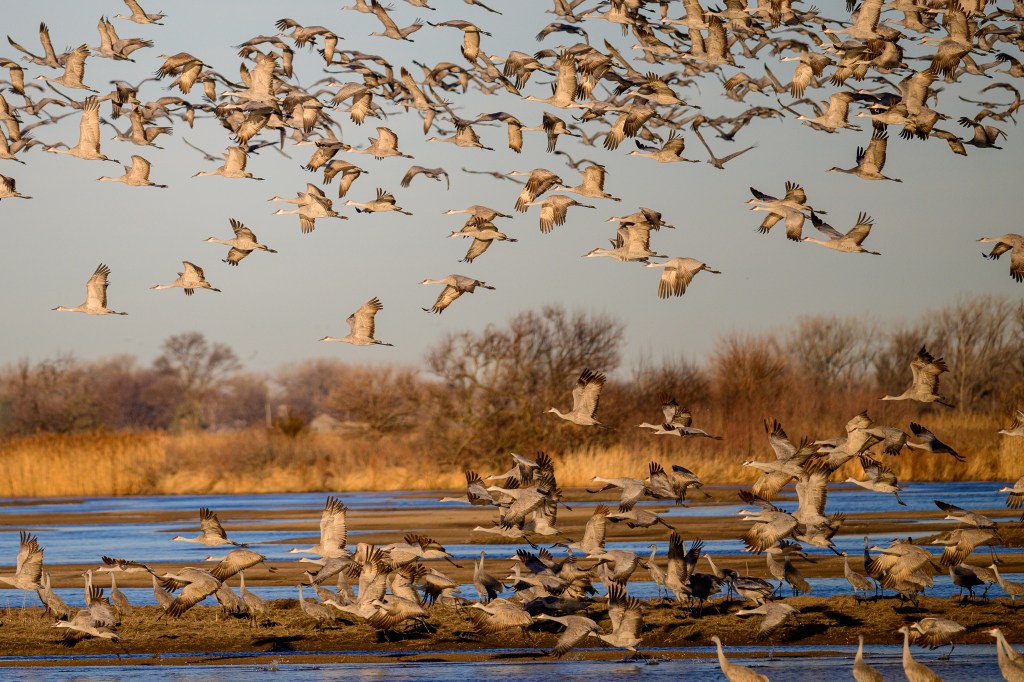
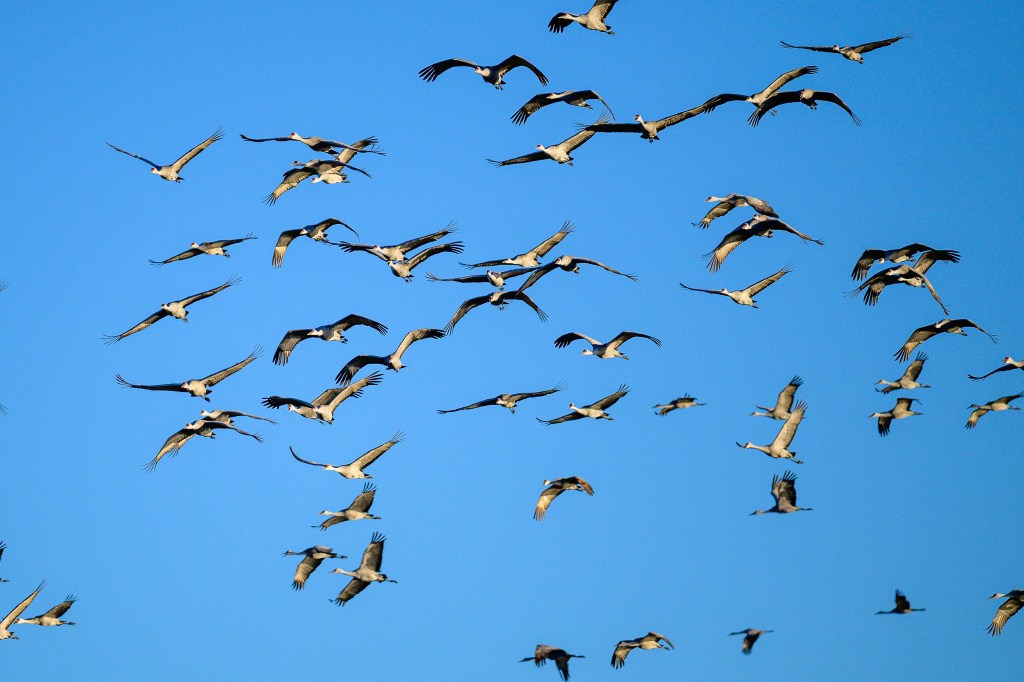
Cranes waking up. How many are in this photo? Look at the birds on the near sandbar and those near the far shore. A thousand?

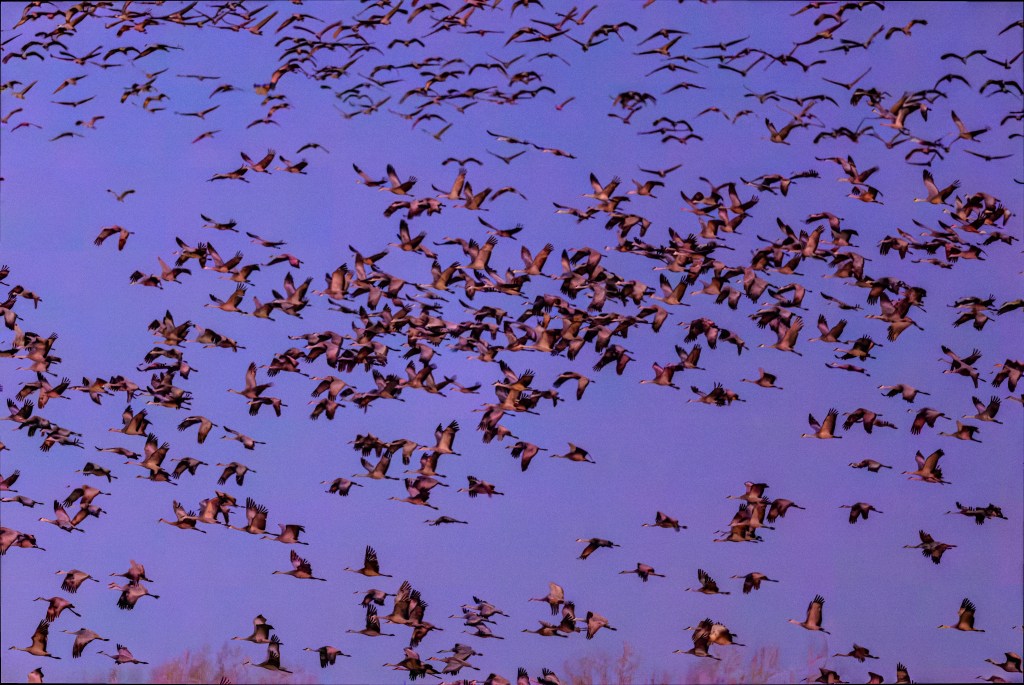
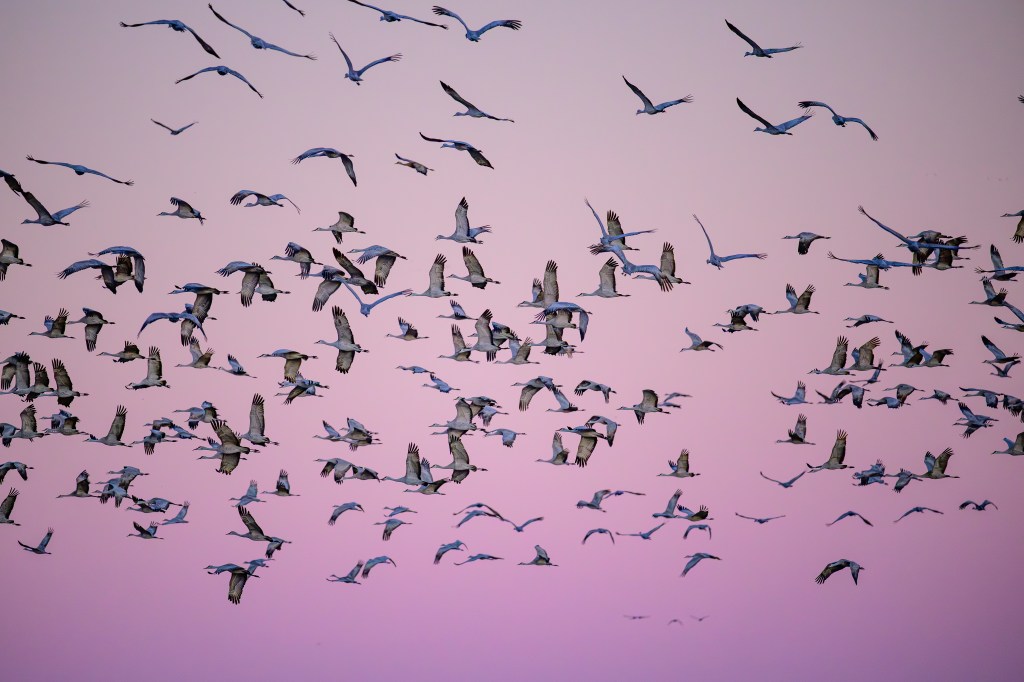
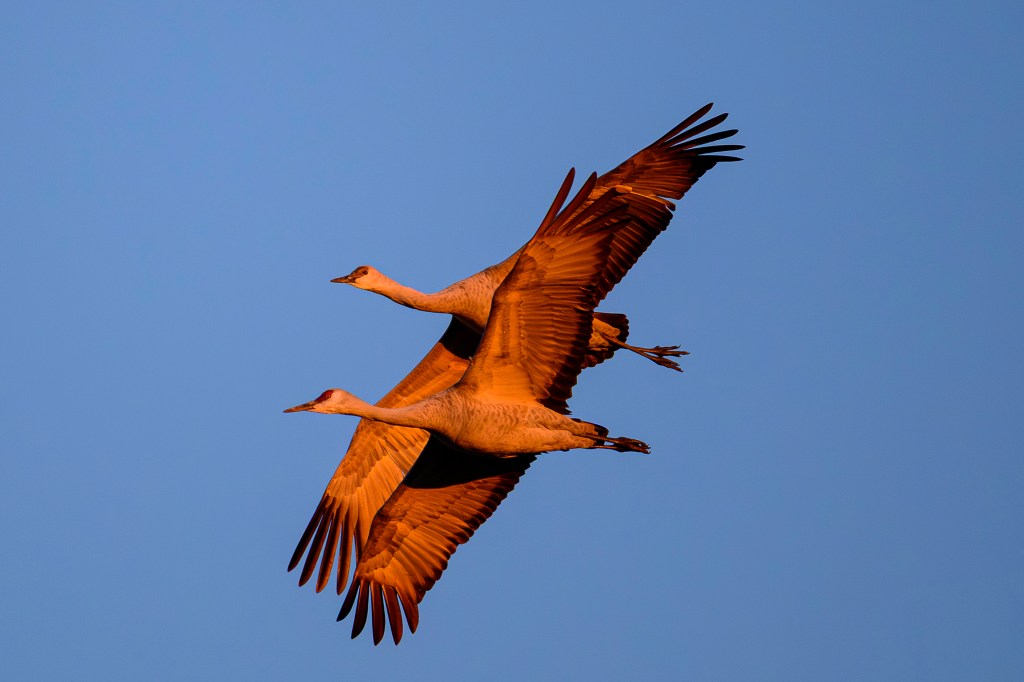
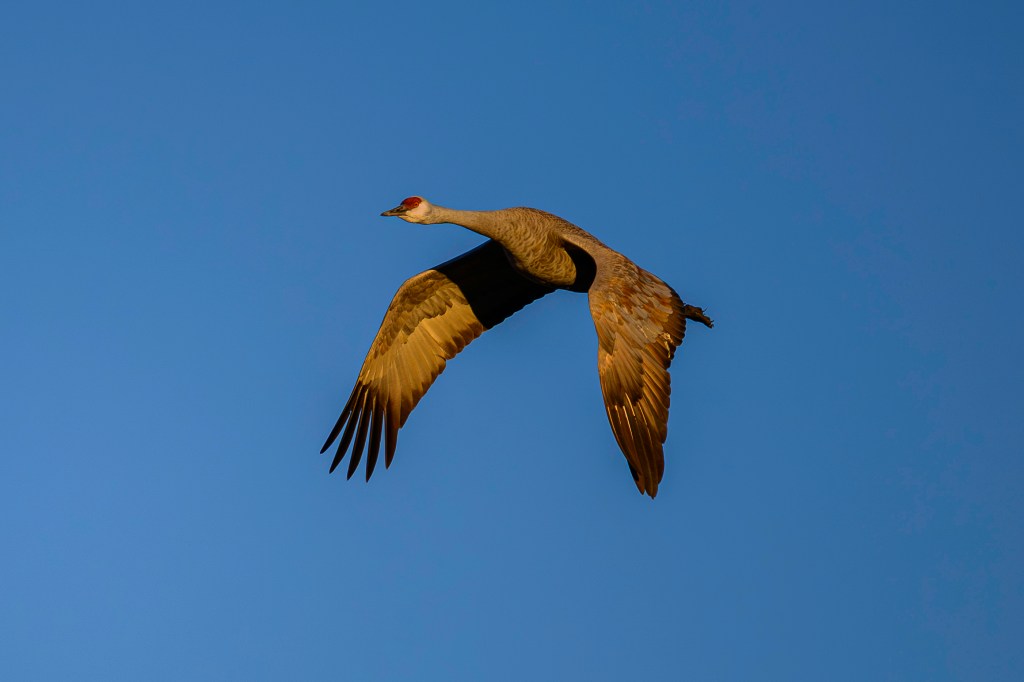
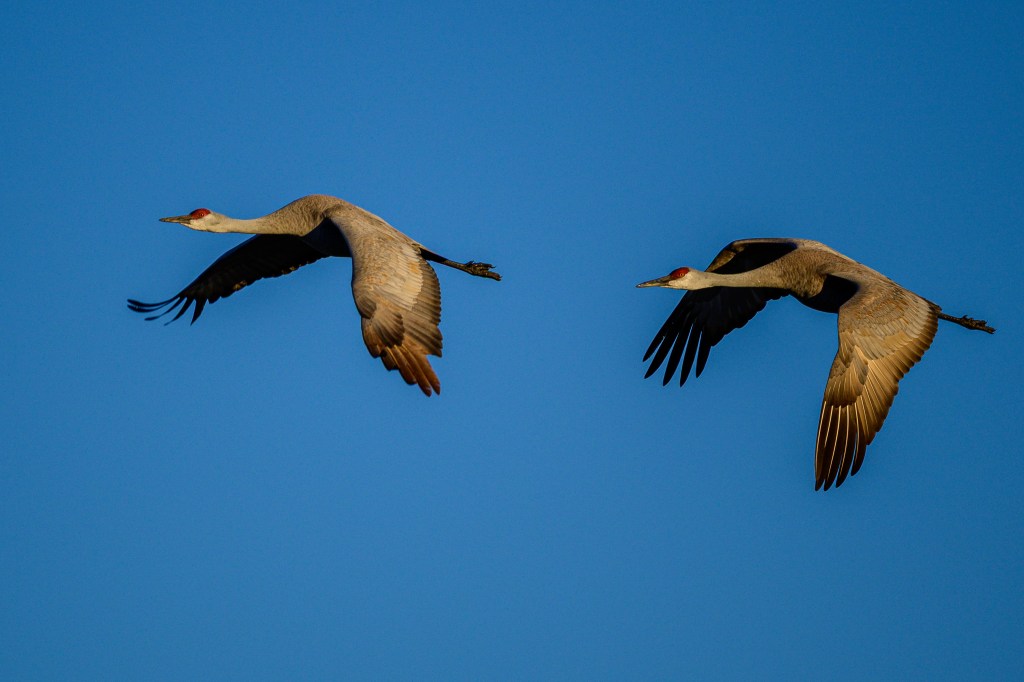
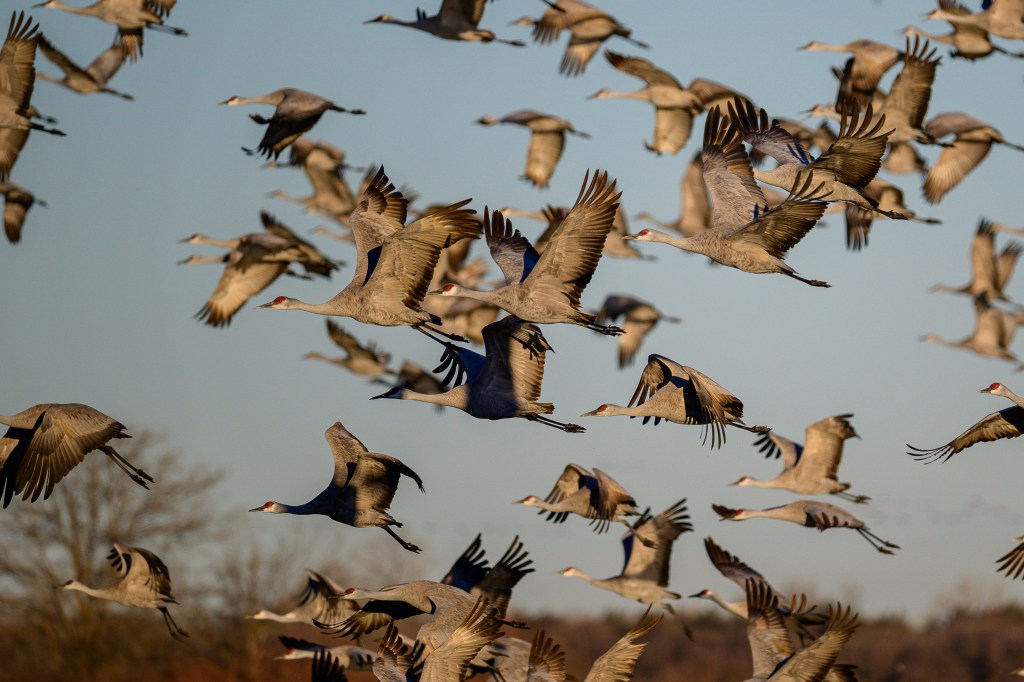
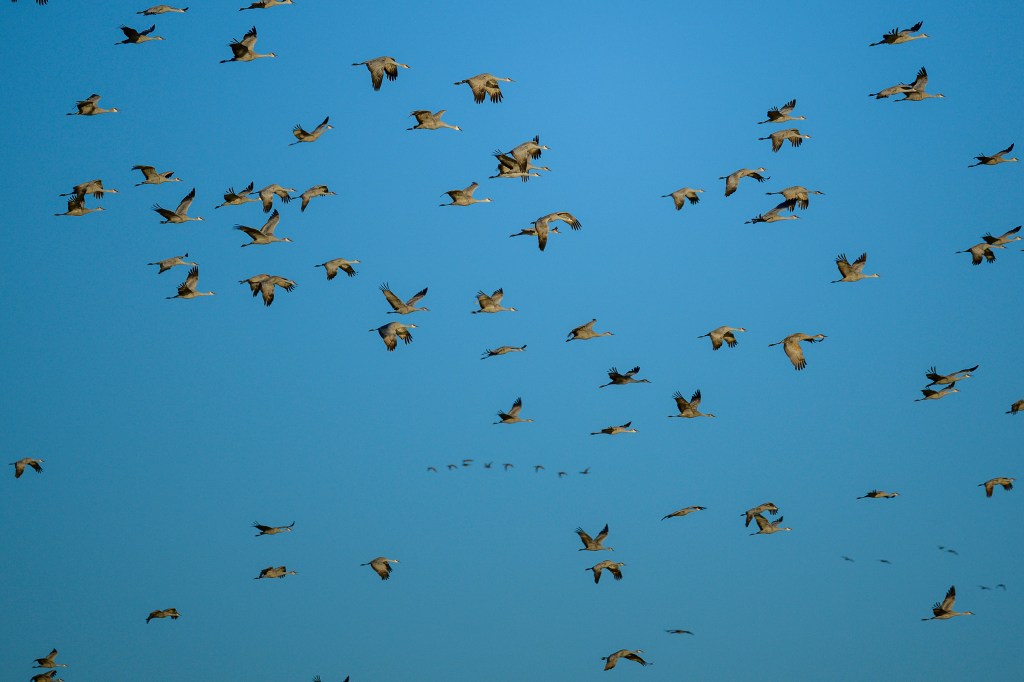
Early light reached some Cranes in the air:
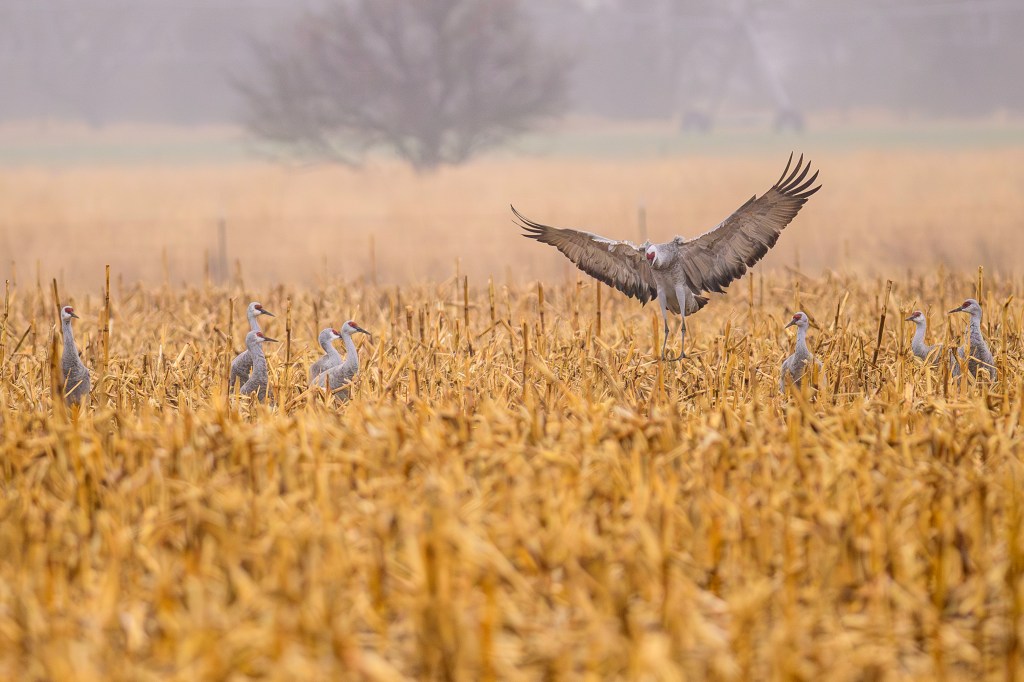
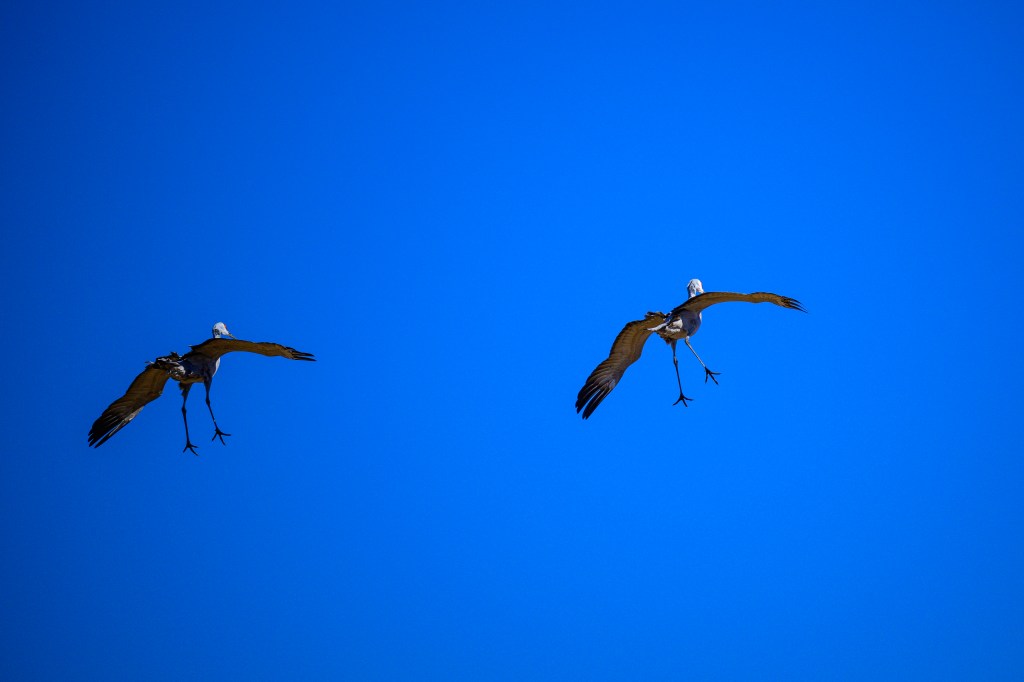
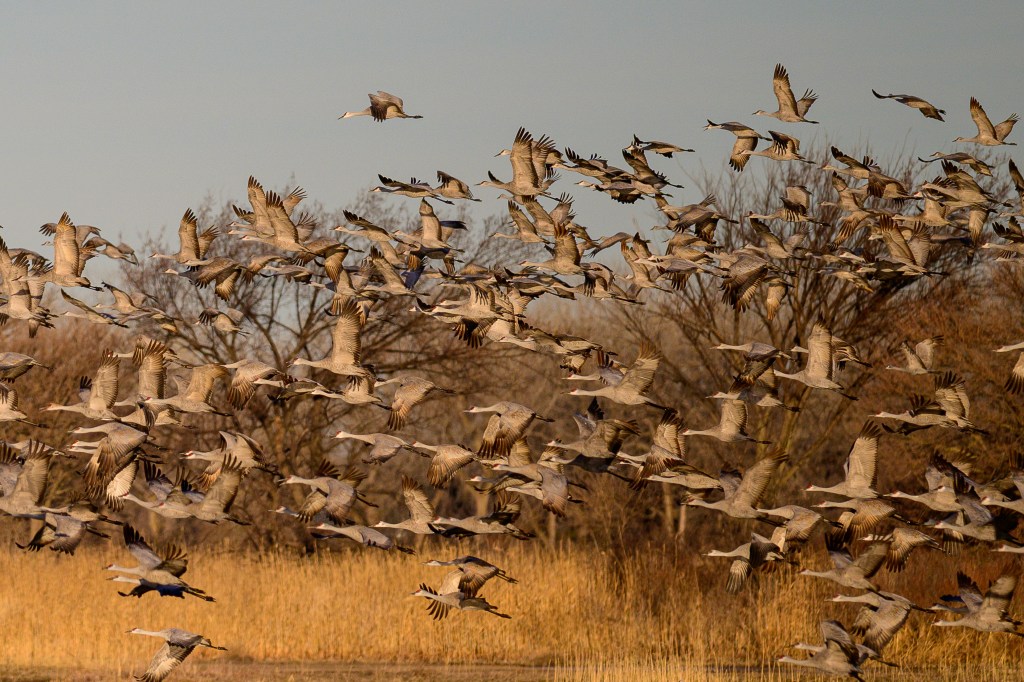
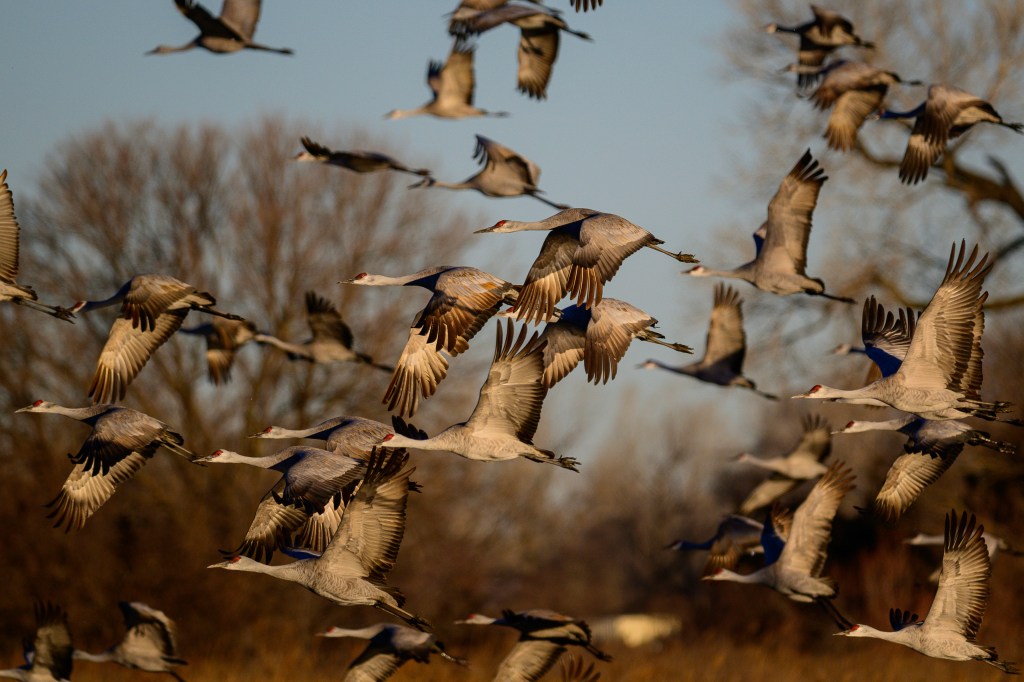
Later in the day we watched Cranes landing in corn fields:
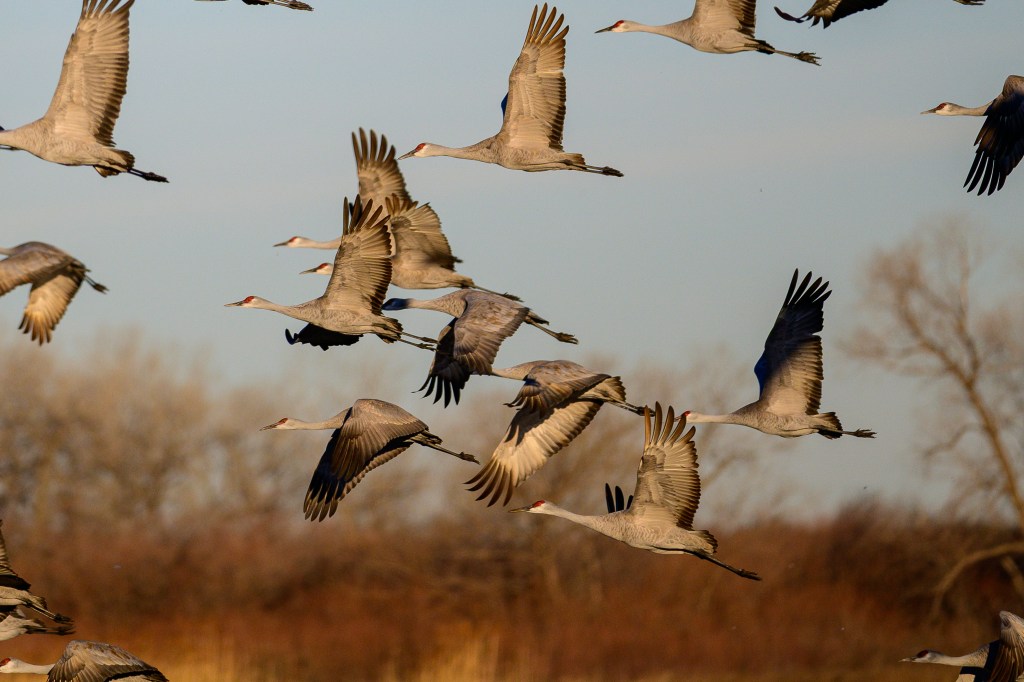
Two Cranes start their approach to land:
NOISE AND DENOISE
In Nebraska we used blinds to observe Cranes. The blinds are large buildings that can conceal 40 people from the birds. In the evening, we entered the blinds before the birds roosted, then watched them arrive. We left in the dark. In the morning, we entered well before sunrise, then shivered as it grew light. The dark-adapted eyes of a human can see much better than a camera set up to photograph birds. I took thousands of photos in an attempt to capture birds in the dark; most images were worthless. In this section, I’ll discuss “noise,” a problem for low-light photography. Feel free to skip ahead to the next photo if technical details about cameras are not your thing.
My Nikon Z8 has a full-frame sensor with 45.7 million pixels. Each pixel is a tiny, square-shaped electronic spot, or “photosite,” that can measure light intensity. Each pixel has a width and height of 4.34 micrometers. For comparison, a human hair has a width of 50 to 100 micrometers. Think of a pixel as a bucket that collects photons of light and turns them into a certain number of electrons. If I leave my lens cap on and take a picture, an ideal sensor would collect no photons and all the pixels would remain empty. If I take the lens cap off and take a picture, I want my camera to collect light photons so that there are some in every pixel, aside from those pointed at truly black (lightless) objects. But I don’t want any pixel buckets to be so full of photons that they cannot accept more; if a pixel is full to overflowing, then it contributes to a white area with no detail. Ideally, most pixels will be partly full and none overly full. This provides an image with lots of clear detail.
Two camera settings control how much light reaches each pixel. 1) Shutter speed. A slower shutter speed (meaning the shutter stays open longer) will let in more light. But a slow speed can blur the image due to camera movement or bird movement. For bird photography, I use a speed of 1/640 seconds for a perched bird or a bird on the ground. For a flying bird, I use 1/2000. Both these shutter speeds severely limit the light that reaches each pixel. 2) Aperture. The lens has an internal diaphragm which can open to let in more light or narrow to reduce the light. Because I use fast shutter speeds, I usually set the aperture to admit as much light as possible.
In a digital camera, there is another setting that can make an electronic image brighter. This is called “ISO.” ISO means “International Organization of Standardization.” This horrible acronym was invented in 1974 to merge two other horrible acronyms, ASA and DIN. If you search the web for information about ISO, you will often find two misleading myths:
Myth number 1: A website for Adobe says: “ISO controls the amount of light your camera lets in, and therefore how dark or light your photos will be.” Wrong. The number of photons that hits the sensor for a given camera and lens is determined by the shutter speed and the aperture. Changing only the ISO will not change how much light reaches the sensor.
Myth number 2: Google AI claims “ISO is a camera setting that determines the sensitivity of the sensor to light…” Wrong. The sensor’s sensitivity to light is determined by the sensor’s physical, chemical, and electronic characteristics. Those were determined in a factory and cannot be changed in your camera.
For a nice internet discussion that rejects the above myths, see https://photographylife.com/what-is-iso-in photography.
So what does ISO tell us or do for our photos?
1. Modern sensors have a baseline ISO. The lower this number is, the better the sensor in terms of its ability to produce a detailed image in good lighting. My Nikon Z8 has a baseline of 64. Most good modern cameras have a setting of 100 or less. The actual size of this number is pretty meaningless, but in general, a sensor with a lower baseline is better.
2. If you change the ISO value of the camera, this boosts the image brightness. Imagine that I take a photo with shutter speed 1/1000, aperture f/4, and ISO 100. Now I take the same photo with the same shutter speed and aperture, but I change ISO to 200. The resulting second photo will look twice as bright compared with the first photo. The change of ISO from 100 to 200 has forced the camera to increase the brightness of the electronic image. Suppose a given pixel bucket collected light from 4 photons. By doubling the ISO value, you are telling the camera to make that pixel look as if it had collected light from 8 photons, doubling the brightness. If the original image was too dark, this forced brightening may be beneficial.
The ISO value of my camera can be adjusted up to 25,600. So the camera can multiply the brightness of a photo by 25600/64 = 400-fold! Great! I can now photograph in the dark, right? Nope; there is no free lunch here, because electronically boosting the brightness of an image will also boost the brightness of “noise.” Noise is the word used to describe tiny random specks of color in a digital image. Photos taken without sufficient lighting will often be ruined by noise.
A perfect camera sensor will record no photons in a completely dark room and the resulting image will be perfectly black. But sensors are not perfect. Pixel buckets are never completely empty of electrons. Due to physical properties of sensors, some pixels will have random electrons in their buckets, unrelated to any actual picture. Imagine that you have a sensor that collects a billion photons coming in from a scene. This imperfect sensor may already have random, artifactual electrons equivalent to 10 million photons in its pixel buckets; . Actual image photons (the signal) outnumber the noise photons by (1 billion)/(10 million) = 100 to 1. This large signal to noise ratio means that we won’t notice the effect of the random electrons in the image. But now imagine that we take the same photograph at night with the same shutter speed and aperture. The sensor now collects only 10 million photons, which is 1/100 th the previous number. We try to compensate for this by increasing the ISO by 100-fold; say from 100 to 10,000. This boosts the image brightness to be equal that of 100 x 10 million = 1 billion photons. But it also boosts the brightness of the random noise by 100-fold, so the signal to noise ratio is now (100 x 10 million)/(100 x 10 million) = 1. This means that random noise now contributes just as much information to the photo as the actual photons from the image. The result will look awful.
Below is a photo taken from a blind on March 8, well before sunrise. I was freezing and shivering, standing at an open window in 30 degree temperature in a building with no heat. My eyes were dark adapted, so I could see birds flying and standing about. I used a shutter speed of 1/1250 and the widest aperture opening of f/4.5. To get an image that was sufficiently bright, I allowed the camera to use an ISO value of 20,000. In the image below, you can vaguely make out blobs in the air.
On my computer, I used Lightroom software to further increase the image brightness from 0 to 2.75, which resulted in the picture you can see below. You can see little colored dots all over the sky and the birds. The image is a blurry mess of noise, which overwhelms the information provided by light photons from the actual scene. The signal to noise ratio is too low; very little signal from actual light, lots of noise created by random, unwanted electronics in the camera. So the high ISO value of 20,000, plus further brightness increases in my computer, produced a lousy picture.
I then tried to denoise the photo using software called DxO PureRaw 6. Seriously, “denoise” is a real word. The result is below. Not perfect, but much better.
The next 3 images were processed to denoise them. The image below had an ISO of 18,000 and I used the Denoise command in Lightroom software.
The next photo had an ISO of 7200 and looks pretty crisp after using Denoise.
The last shot in this series had an ISO of 5600. The detail in the feathers is impressive. Thanks to denoise in software, images that are degraded by noise can now be processed into useful photos.
Denoising an image is commonly called an AI (artificial intelligence) method. There is not much “intelligence” involved. The software does not “know” if the photo shows birds, cars, or coffee beans. It just uses algorithms to remove colored dots that were erroneously generated by the sensor. I suspect the software companies call this “AI” to sell more software. In fact the process is quite thoughtless, using computerized brute force algorithms. Compared with other photo editing commands, the process is slow; on my Mac Studio it takes about 15 seconds per photo.
AI can be used to alter or fabricate images. Photo contests understandably forbid photos that have been altered by “AI.” I agree that images should not be in contests if they were altered to make up things that were not in the original scene. But some contests forbid using denoise to process an image just because this is an “AI” method. That seems misguided to me. Denoise algorithms are intended to remove noise, an artifact that is introduced by the camera. The goal is to produce an image closer to the actual scene.
MARCH 8
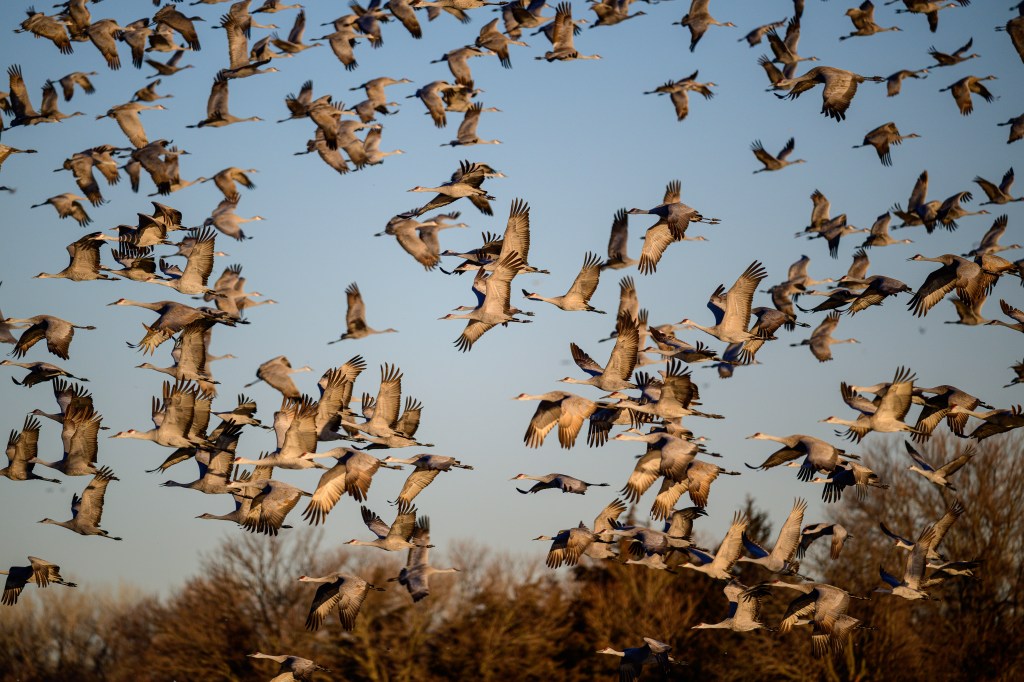
On March 8 I woke up at 4am (bird photography demands sacrifice) and drove to the Rowe Sanctuary. There was no fog and the birds were to the west, so the sun was coming up behind me, a favorable set-up for photography. I cut loose. I took three thousand pictures while it was still too dark, and then six thousand images with good lighting. There were thousands of Cranes in front of the blind, standing on sandbars in the shallow Platte River.
I was prepared to shiver on hard benches. I anticipated being bored for a while in the dark. I predicted hunger and the desire for hot coffee that was not there. I expected thousands of birds, which thankfully were there. But I was not prepared for the noise. Bird noise, not camera noise. I thought the Cranes would be quietly sleeping in the dark. Some were. But many were awake and emitting loud grunts, groans, gurgles, croaks, and clucks. A burbling cacophony. How could they sleep? If I was traveling with 500,000 friends, I would like my own private room, thank you. But I’m not a Crane. A Crane wants to survive the night and find food the next day. Other Cranes offer protection. The constant racket means that the sentries are awake and will call a warning if a bobcat approaches. The noise continues 24/7. Being a Sandhill means a social life with din that never stops.

TOP GUN
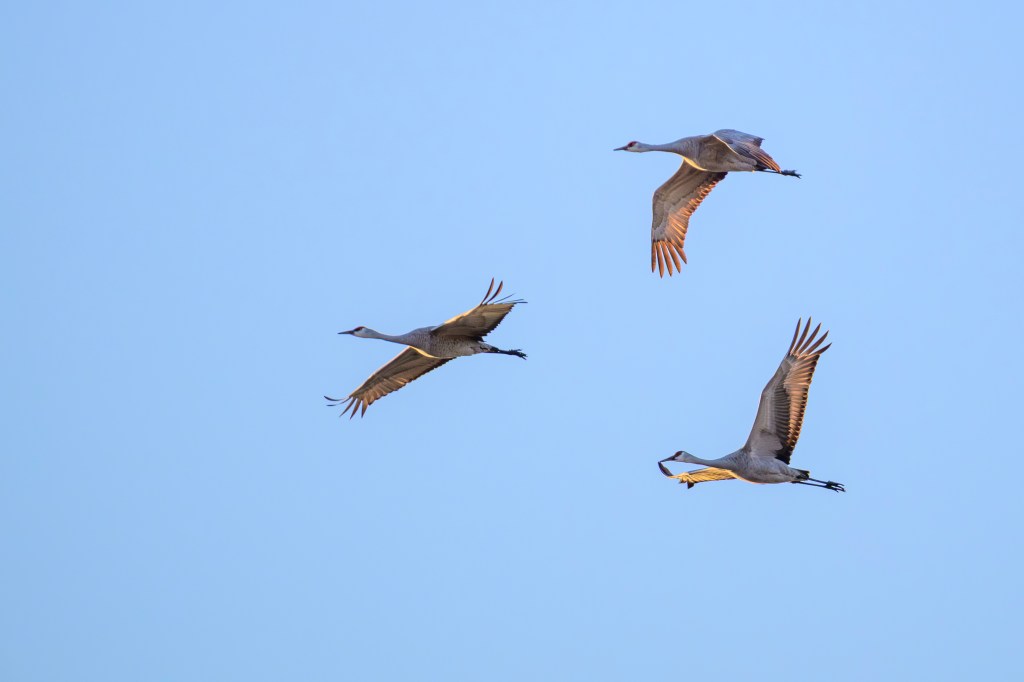
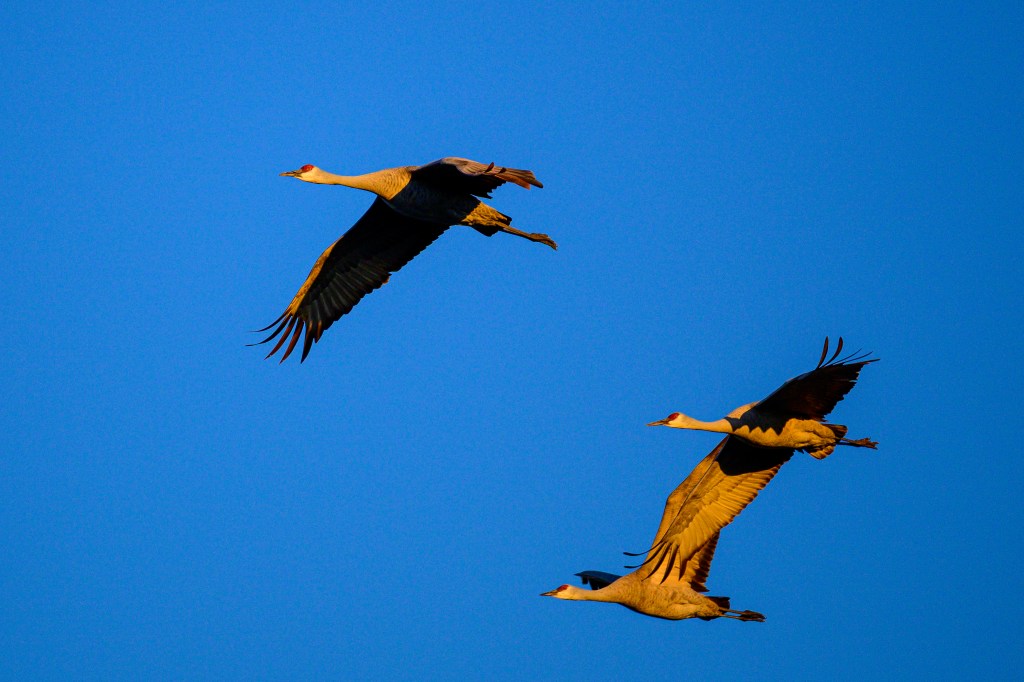
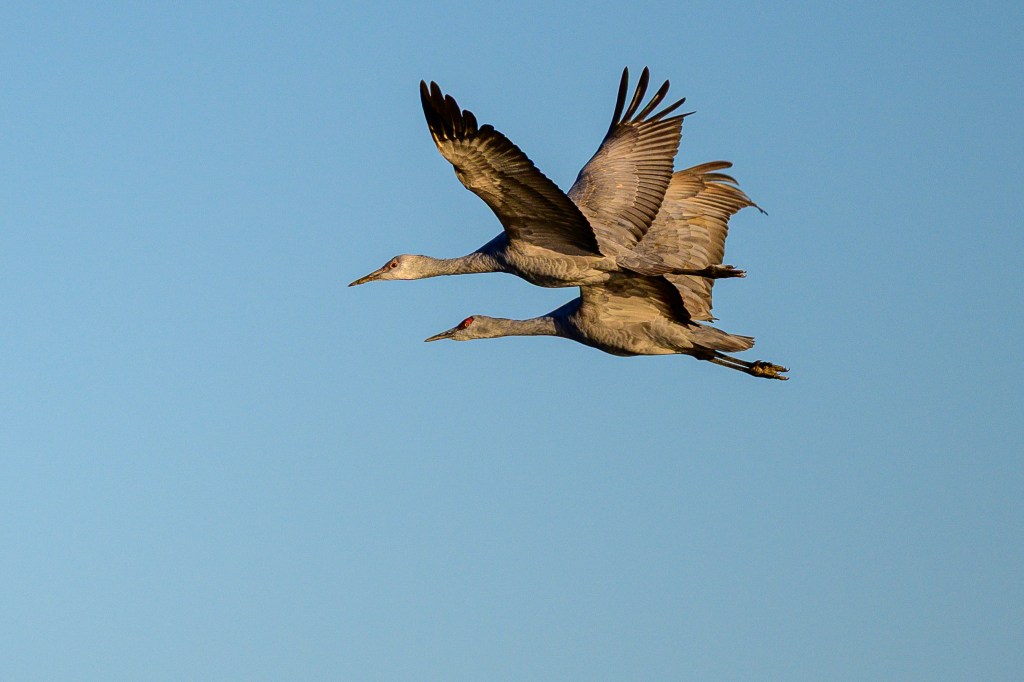
Thirty-one minutes into the 1986 movie Top Gun, Tom Cruise (aka Maverick) is in a training exercise. His F14A Tomcat is being hunted by instructor Lt. Commander Rick “Jester” Heatherly. As Jester is about to fire, Maverick jerks up the nose of his jet, slowing it and forcing Jester to pass him. Sandhills can do the same thing. In the first image, Sandhill A is leading and B is squawking a message, “Let me go first.”
Crane A flares its wings to slow down.
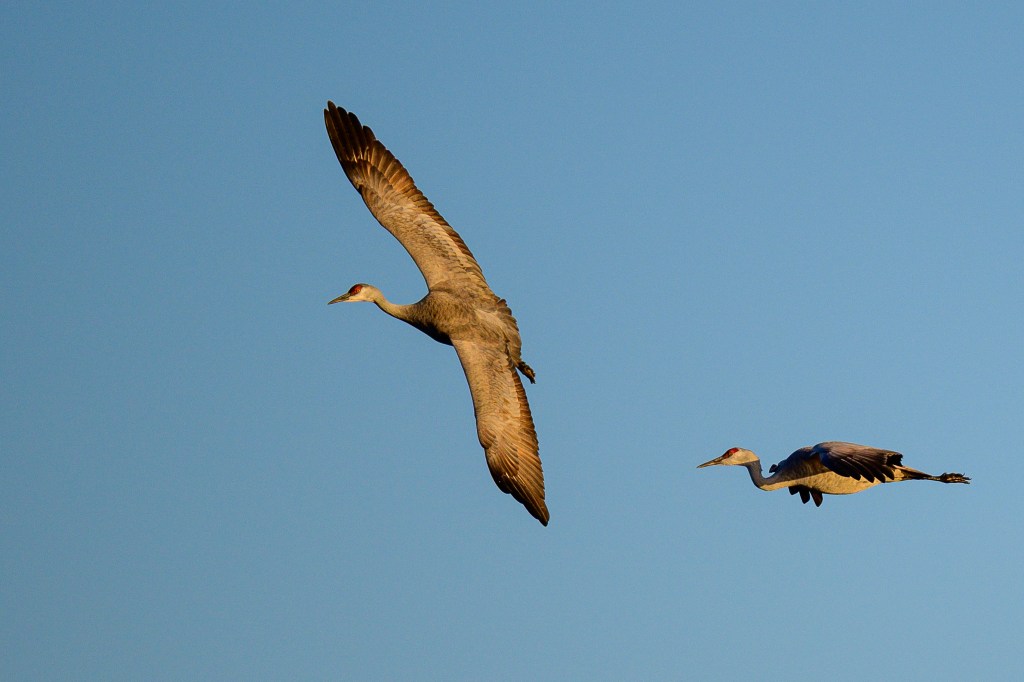
Crane A then drifts back at slower speed, while Crane B moves to the front.
Crane A then dives downward a bit, avoiding B and slowing further.
Finally, Crane A ends up behind Crane B. They both squawk “well done” and continue.
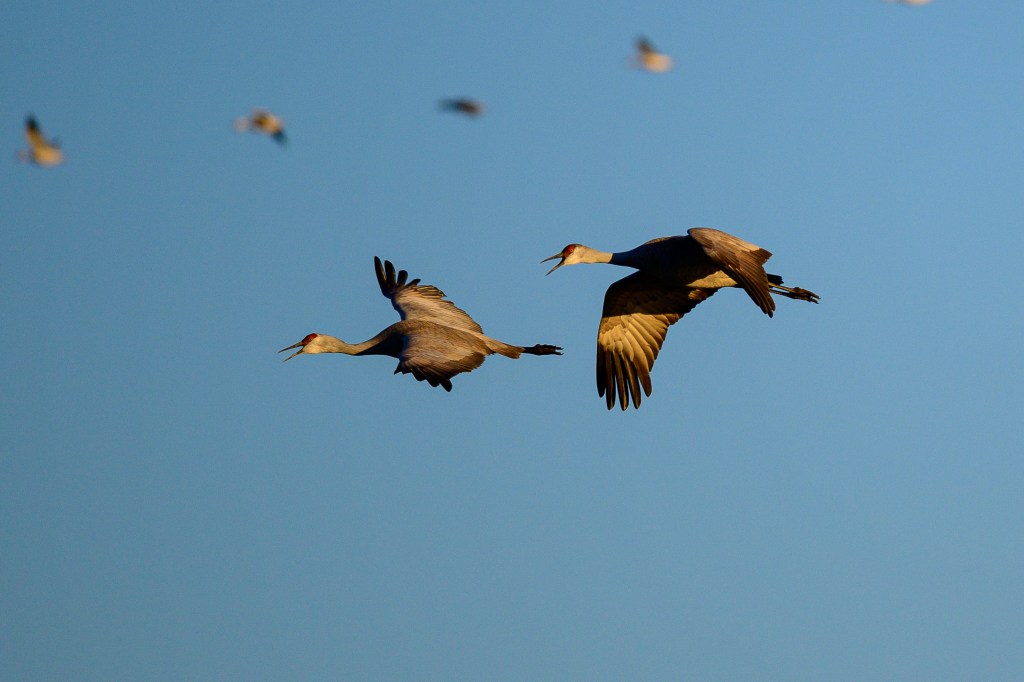
If you prefer, ignore my Top Gun analogy. What the photos show is what cyclists do when they change position in a paceline.
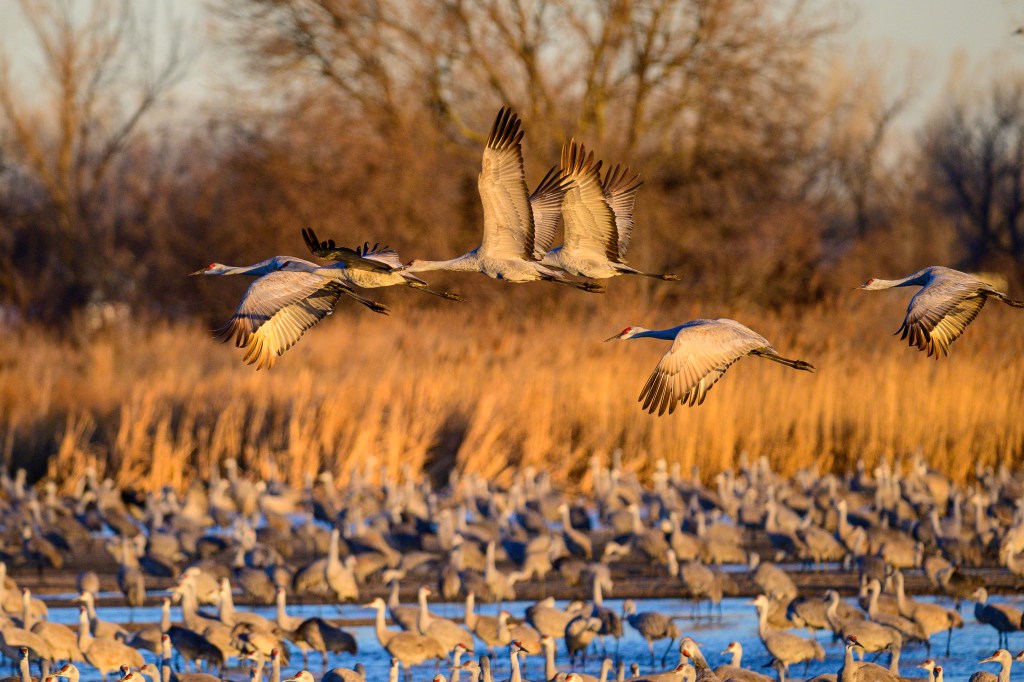
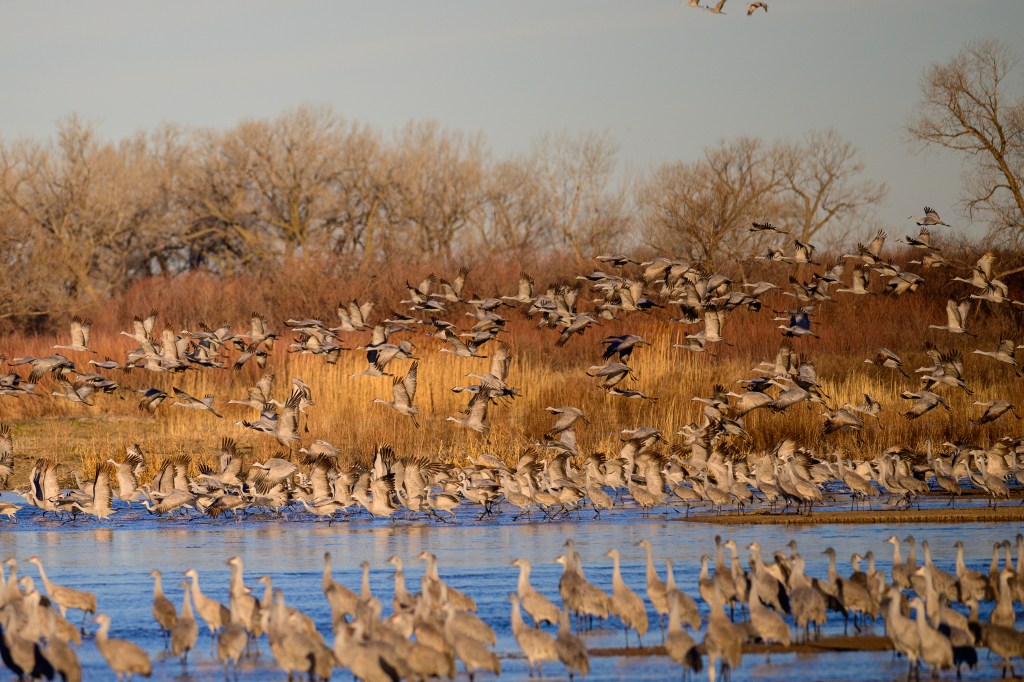
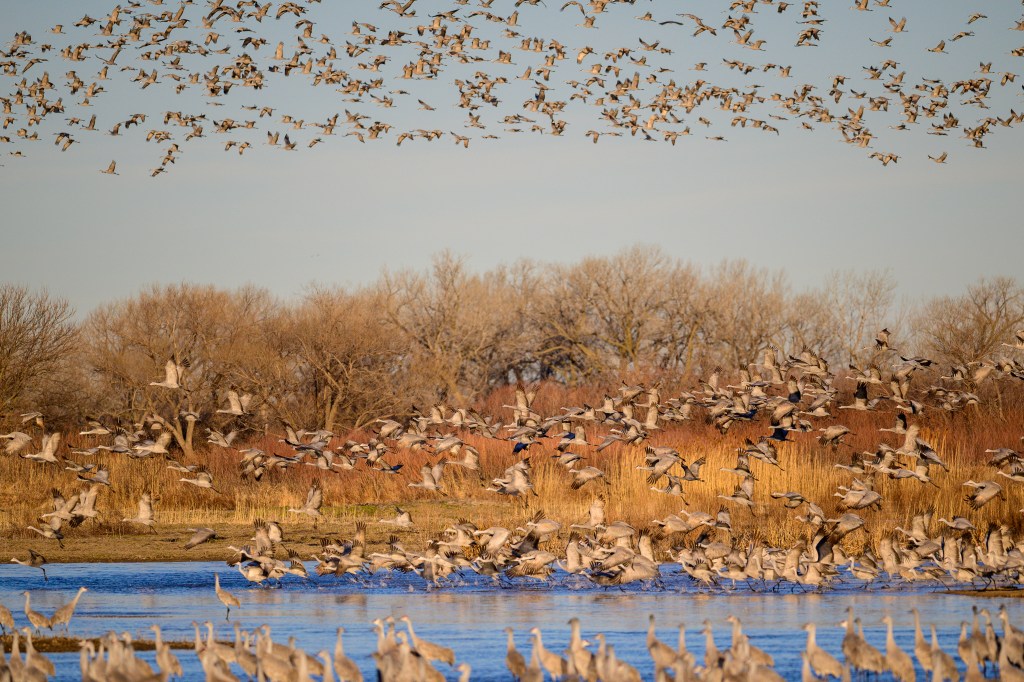
THE BIG LIFTOFF
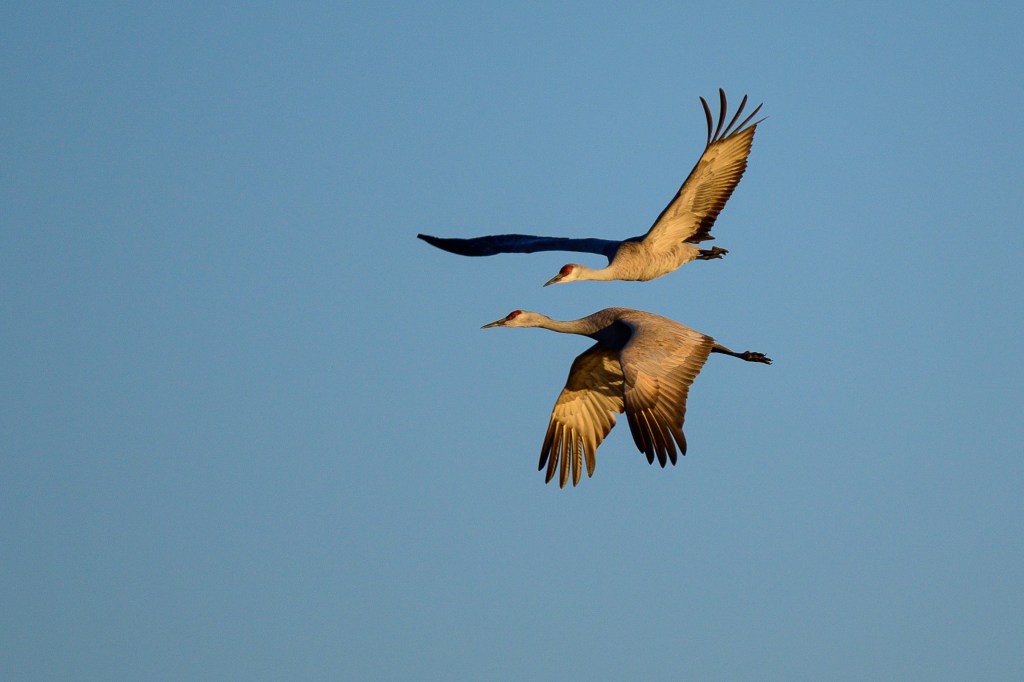
On March 8, at 8:44 am, half the cranes were airborne, looking for food or starting to migrate north. Suddenly, the remaining cranes took off; perhaps 2000 cranes over the space of a minute. The air filled with cranes. There was a slight breeze coming from our left, so the cranes ran in that direction, using the wind to help them lift off. The flapping of wings and cries of birds were deafening. Up to then we had been whispering to each other in the blind. Now we had to shout. In the first photo, you can see the cranes starting to run in the water; by the third picture they are in the air. Within a minute, there were cranes flying in all directions.
NOT CRANES
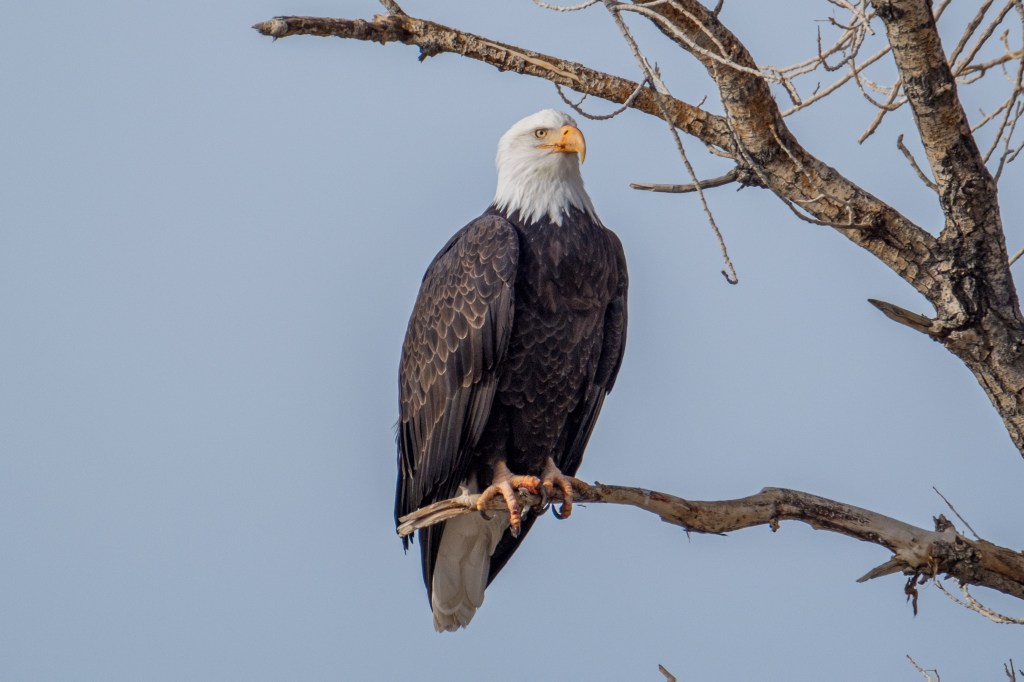
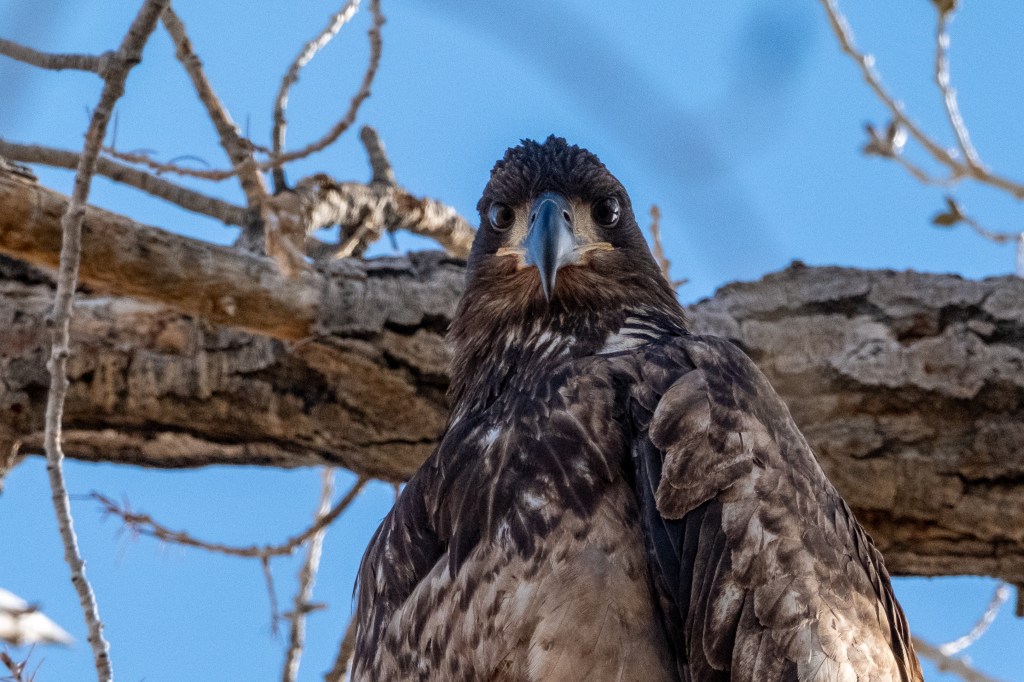
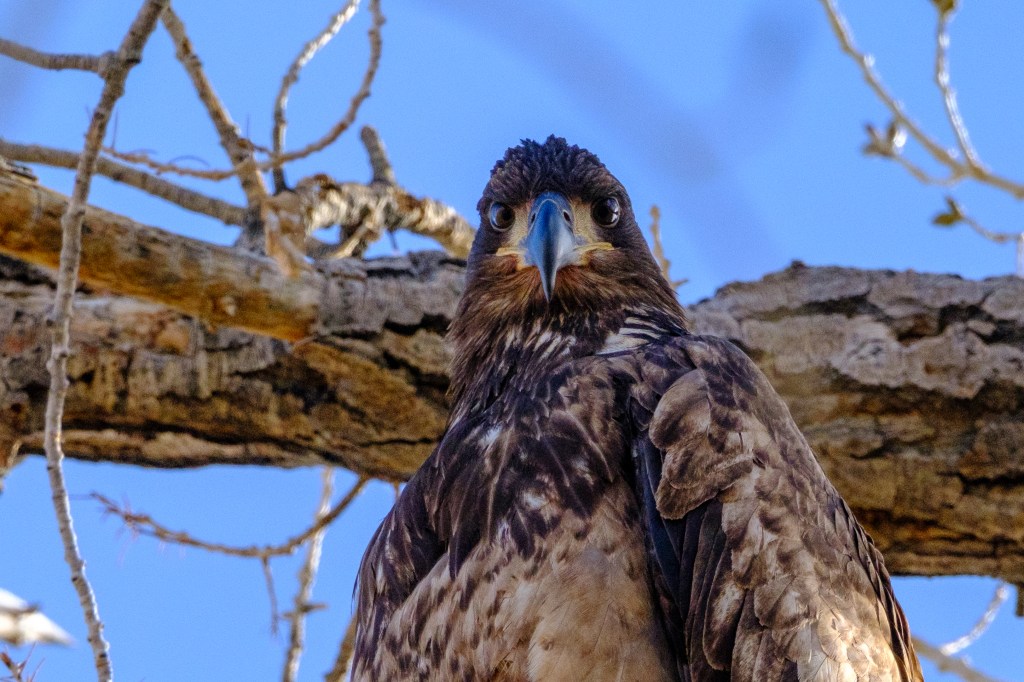
There are things in Nebraska aside from corn and Cranes. Below, a juvenile Bald Eagle stands by itself, probably causing anxiety for the Cranes.
Northern Pintails were common.
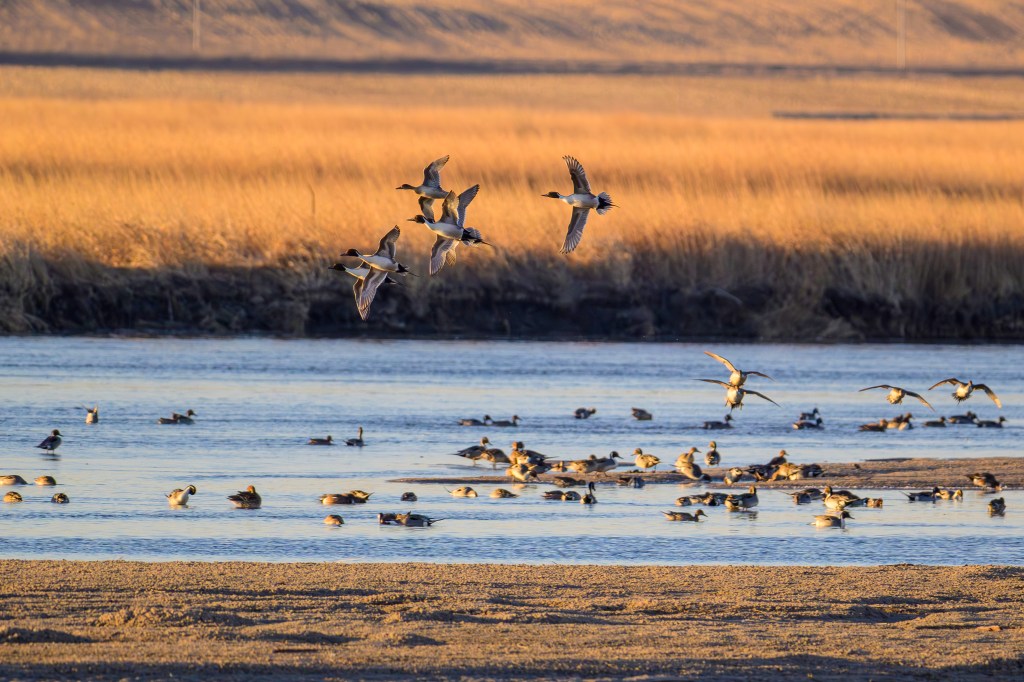
Below is a flock of Snow Geese.
More Snow Geese are in the photo below. Initially I thought the darker birds were Canada Geese or Greater White-fronted Geese, which often mingle with Snow Geese. But they are a dark morph of Snow Geese, called Blue Geese.
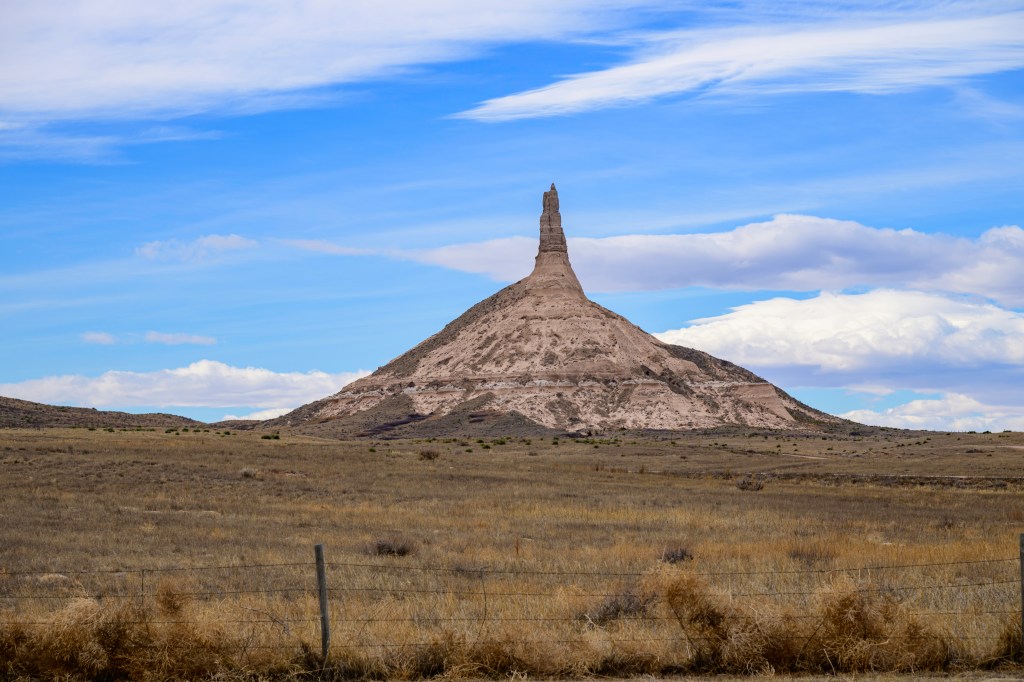
Chimney Rock, below, was a landmark on the Oregon Trail. It is now a national historic site.
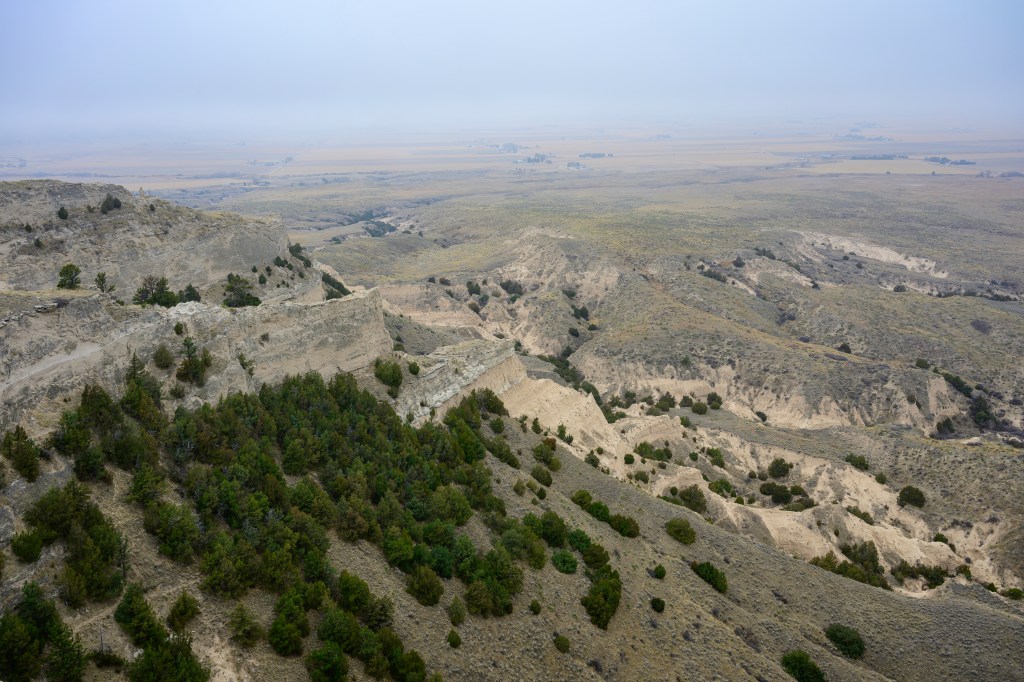
Below is a foggy view of badlands seen from Scotts Bluff in Scotts Bluff National Monument.
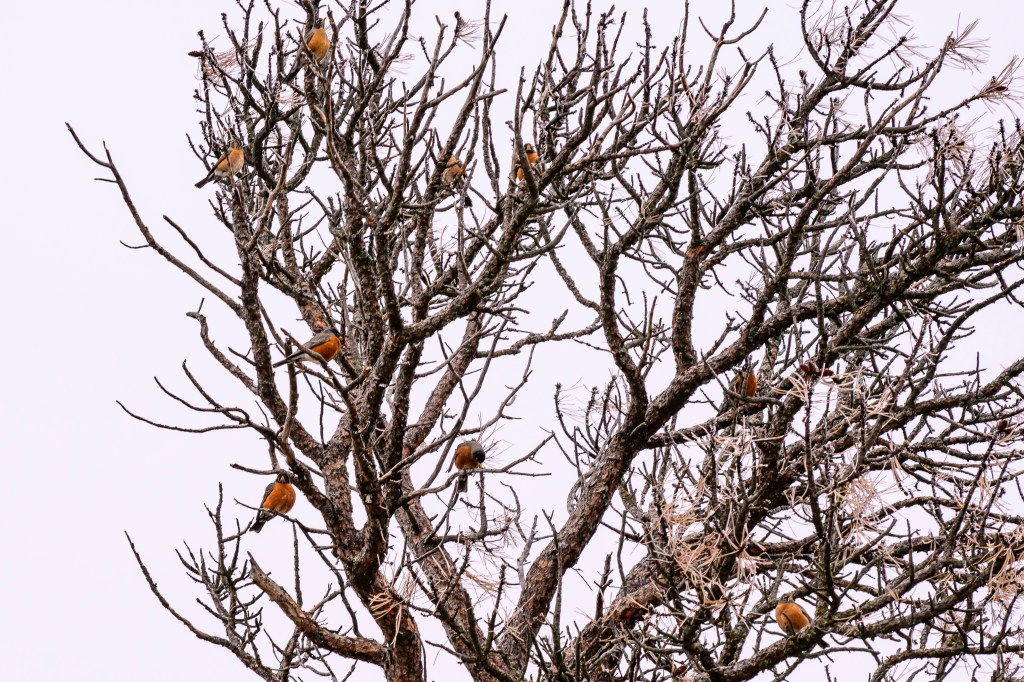
Nine American Robins are sitting in this tree on top of Scotts Bluff.
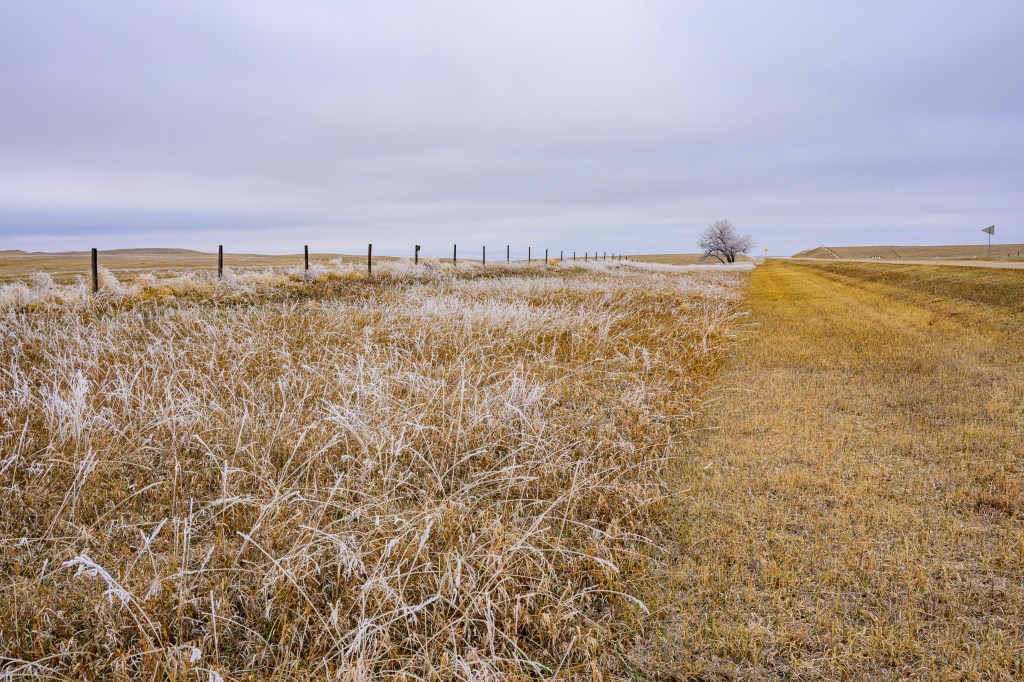
On Highway 29 we noticed white areas on both sides of the road and stopped to look. Freezing fog coated the longer grasses and trees. Areas that were mowed or grazed were mostly ice free. This all melted an hour later.
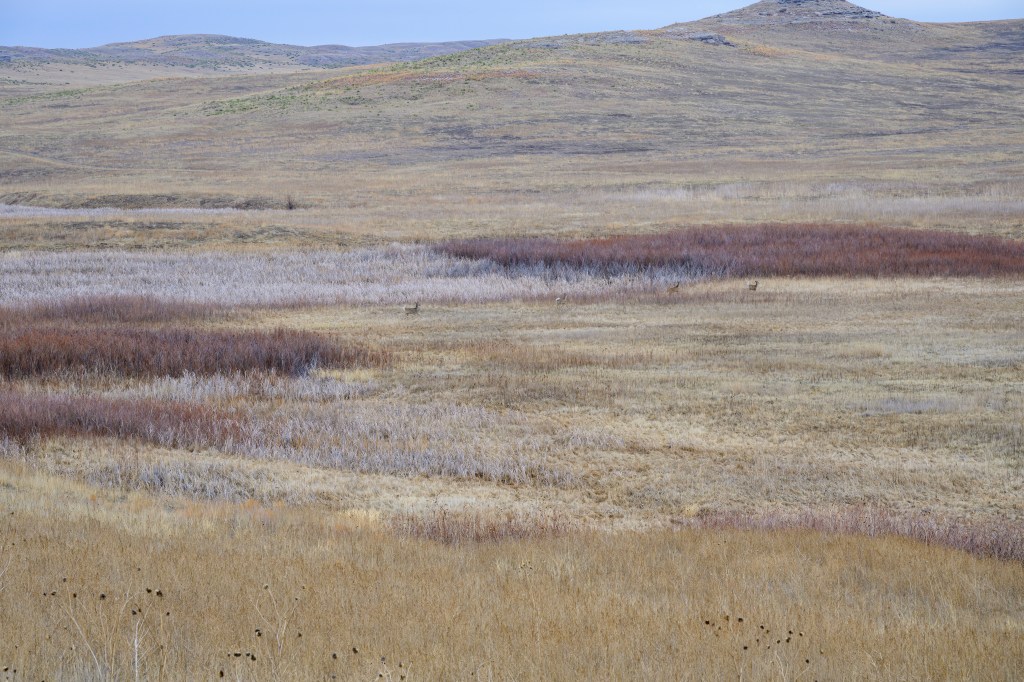
Four White-tailed Deer can be seen running across the valley of the Niobrara River, in Agate Fossil Beds National Monument. At 2pm we were visitors number 6 and 7 for the day. Come here to avoid crowds.
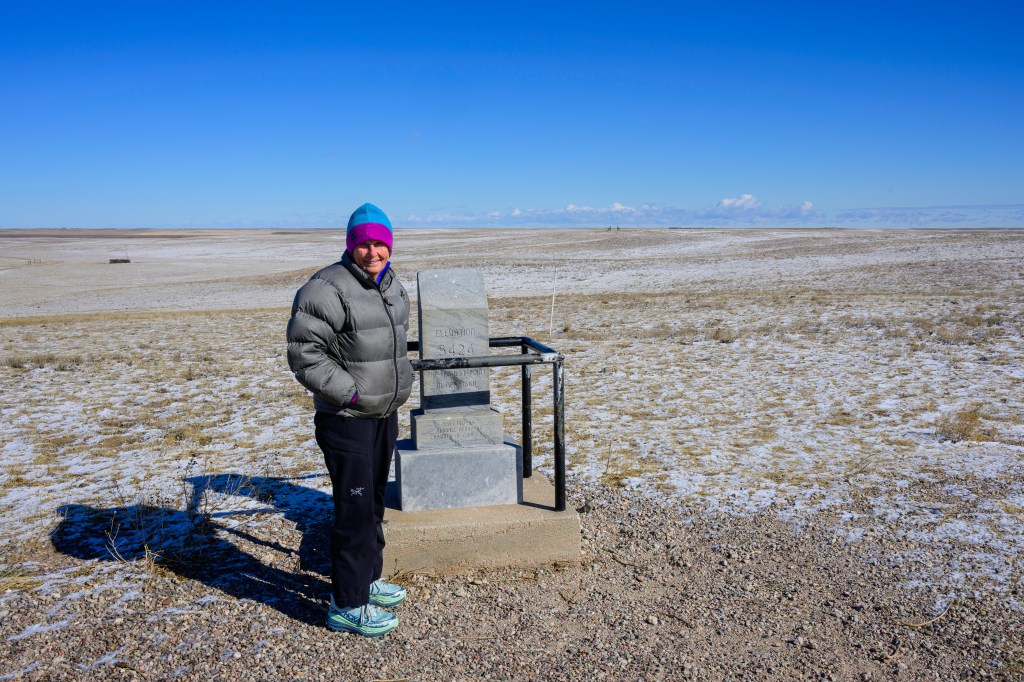
Below, a professional model posed at elevation marker 5424 feet, the high point of Nebraska. I have now been to the high point of 13 states. Roberta has been to eight. Please remember this, as this stuff is important. And yes, the white stuff is fresh snow.
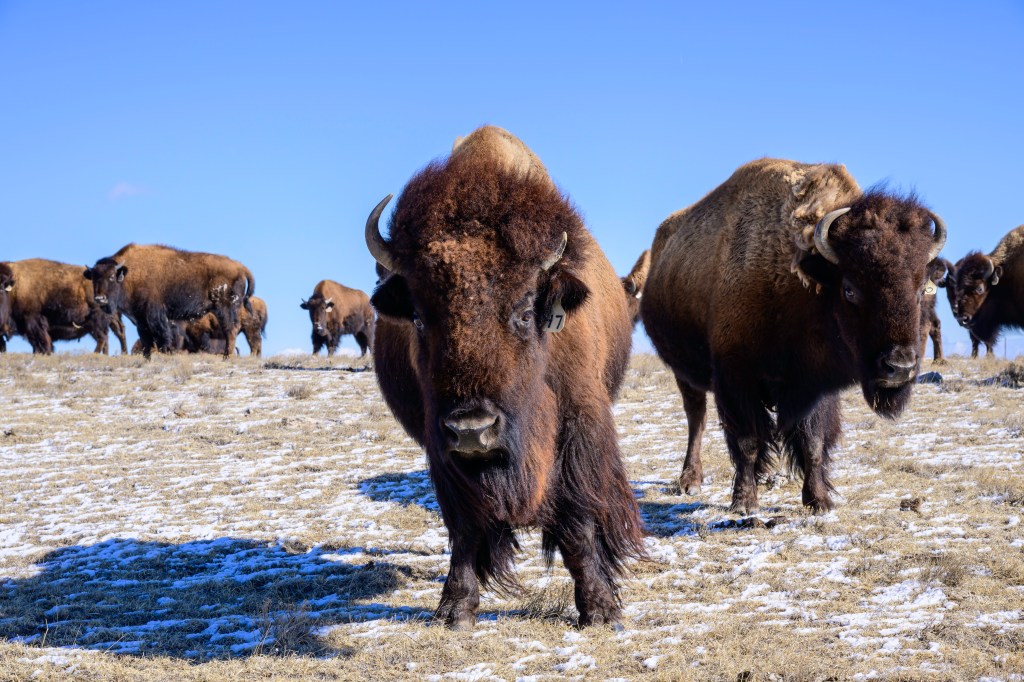
Nearby was a herd of domesticated Bison. Millions of these beasts used to prance across Nebraska; now they are raised to become burgers.
FINAL THOUGHTS
Earlier, I said that Sandhill Cranes spend the winter near the Gulf of Mexico and fly north to breed in the Artic during summer. My description implies Mexico, New Mexico, and Texas are their “home.” But this may have it backwards. Sandhill Cranes start life during the summer in the high artic. The tundra is a nesting area with a good food supply, few predators, and long summer days that allow parents to forage for their chicks. The artic is their home and the place they prefer above all others. In the fall, the approach of artic winter forces them to move south, a temporary displacement. In spring, they head back north to their preferred home, where millions of Cranes have been born and raised over thousands of years.
Seasonal migration is a strategy that allows birds to reuse a successful nesting location. This view of migration has been discussed by many authors. See Cavanagh P. How Birds Fly: The Science & Art of Avian Flight. Buffalo, NY: Firefly Books; 2024, p228, Winger BM, Auteri GG, Pegan TM, Weeks BC. A long winter for the Red Queen: rethinking the evolution of seasonal migration. Biological Reviews. 2019;94:737-752, and Sibley DA. The Sibley Guide to Bird Life and Behavior. New York: Knopf; 2001, p60.